Want to make an appointment with one of our expert plumbers? Get in touch!
Want to learn how to unblock a sink? This article walks you through 6 easy, DIY methods to unblock your sink in a hurry.
Dealing with a blocked sink can be frustrating, but with the right approach, it’s a problem you can often solve without professional help. We’ll help you make sure your sink drains as good as it did when you first installed it!
DCM Plumbing is a leading plumber on the Gold Coast and blocked drains expert. If you need plumbing services of any kind such as leak detection or burst pipe repairs, contact us today.
6 Ways to Unblock Your Sink Today
As professional plumbers with 37+ years of experience, we’ve seen our fair share of blocked sinks. Here are 6 tried and tested methods to unblock your sink yourself today, based on our years of experience!
Method 1: Boiling Water
- Boil a pot/kettle of water.
- If you have PVC pipes, let the water cool slightly.
- Slowly pour the water directly into the sink drain.
- If the blockage persists, repeat or try adding dish soap for extra grease-fighting power.
How it works:
The intense heat of boiling water helps to melt and dislodge common organic blockages like grease and soap scum.
Method 2: Bicarbonate of Soda and Vinegar
- Pour a cup of baking soda into the drain.
- Follow with a cup of white vinegar.
- Allow the mixture to fizz and work for several minutes.
- Boil a pot/kettle of water and pour it down the drain to flush out the mixture and any loosened debris.
How it works:
The chemical reaction between baking soda and vinegar produces gas which creates a fizzing action. This helps to break down and loosen blockages in your sink.
Method 3: Caustic Cleaners
- Carefully read and follow the instructions on the caustic cleaner.
- Pour the recommended amount into the drain.
- Leave it for the specified time to break down the blockage.
- Flush thoroughly with cold water.
- Avoid using if you have PVC, old, or glued pipes.
Why it works:
These cleaners contain strong chemicals that dissolve organic materials like hair and food scraps, clearing the blockage. Using these chemicals too often can damage your pipes, so only use this method when strictly necessary.
Method 4: The Trusty Plunger
- Place the plunger over the drain to create a seal.
- Pump the plunger with short, sharp movements.
- After several pumps, check if the water drains smoothly.
- Repeat if necessary, adjusting the seal and pressure.
Why it works
The suction and pressure created by the plunger dislodge blockages by physically moving them along the pipe.
Method 5: The Wire Hanger
- Unbend a wire hanger and create a small hook on one end.
- Gently insert the hook into the drain.
- Fish around for debris and pull out any blockages.
- Be careful not to push the blockage further down.
Why it works:
Quite straightforward – the hook on the end of the wire hanger can physically grab and remove debris causing the blockage.
Method 6: Manually Clear Out the U-bend
- Wear old clothes and rubber gloves, and place towels under the sink with a bucket nearby to catch drips.
- Locate the U-bend under the sink, slowly unscrew it with a shifter spanner to let water drip into the bucket, then completely remove it.
- Take it to another sink or outdoors, and clean it thoroughly using a wire coat hanger, warm water, and disinfectant spray.
- Reconnect the U-bend using the shifter spanner and test for leaks by running water. If there’s a leak, reattach it again.
Why it works:
Manually clearing the U-bend allows you to physically remove blockages and thoroughly clean the pipe, ensuring the removal of any debris causing the clog.
What Causes a Blocked Sink?
There’s no use in just learning how to clear a blocked sink, you need to also understand the cause, and then prevent it from happening again. There are many causes of blocked sinks, and usually, a drain clogs when a couple of these causes happen at the same time. The various causes of the clogs will vary depending on whether you have a blocked drain in the kitchen sink, bathtub, shower, or toilet.
Grease or Cooking Oil
Grease and cooking oil stick to pipe walls, leading to potentially severe clogs. Prevent this by disposing of oil in the bin or using hot water and dish soap to dissolve it before it solidifies in the pipes.
Hair
Hair accumulates and tangles, causing blockages in showers and basins. Brush hair before showering and use a quality hair catcher to prevent it from going down the drain.
Wet Wipes and Non-Flushables
Items like wet wipes and nappies don’t break down like toilet paper, leading to severe blockages (yes, even so-called “flushable wet wipes”). Only human waste and toilet paper should go down the toilet!
Food Scraps
Food scraps can accumulate and cause blockages. Use a basket waste or sink strainer plug to catch food scraps before they enter the drain.
Trees and Leaves
Leaves, twigs, and tree roots can block storm drains. Regular cleaning, leaf guards, and proper landscaping can prevent this.
Mineral Build-Up
Hard water can lead to calcium build-up in pipes. Use water softeners, vinegar solutions, and regular drain cleaning to manage this.
Cat Litter
Cat litter can create clumps that block pipes. Avoid flushing cat litter; instead, dispose of it in the trash and use a drain strainer to catch any stray litter.
Implementing these preventive measures can significantly reduce the risk of blocked drains in your home.
Call DCM Plumbing for Any Stubborn Blocked Sinks
If none of the methods above help with your blocked sink, it’s time to call in the experts at DCM Plumbing. Our skilled team is equipped to handle even the most stubborn blockages, ensuring your drains are cleared efficiently and effectively. We use professional tools and techniques to diagnose and resolve the issue, preventing future problems. Don’t let a blocked sink disrupt your daily routine – contact DCM Plumbing for prompt and reliable service.
In this blog, we look at how to renovate your bathroom in 11 easy steps. From beginning to end, we have you covered.
Planning a bathroom renovation? Begin by setting a clear vision, assessing the plumbing needs, and deciding on DIY versus professional help. From layout design to fixture selection, each step matters. This guide helps navigate the renovation process, ensuring a smooth and successful transformation of your bathroom space. Let’s embark on this journey to create your ideal bathroom.
DCM Plumbing is the best plumber on the Gold Coast. We are available 24/7 for all your plumbing needs. With 1000+ 5* Google reviews and 35 years of experience, we are known as the best for a reason. Need a plumber for your bathroom renovation? We can help.
Your Complete Bathroom Renovation Guide
Step 1: Figure Out What You Like
Starting a bathroom renovation begins with understanding what you like. Explore different designs to understand what resonates with you. Look through magazines, visit showrooms, and scroll through online inspiration platforms, even check out our blog on the types of bathroom fixtures. Pay attention to the styles, colours, and layouts that catch your eye. Are you drawn to modern minimalism, classic elegance, or a bohemian vibe? Do you want a minor reno or do you want to make the whole bathroom a wetroom? Here are some other reasons why figuring out what you like first is so important:
- Understanding your preferences early on helps streamline the decision-making process, narrowing down options for easier material and design element selection.
- Your style preference forms the foundation of all subsequent design decisions, influencing everything from tile selection to fixture choice.
- Aligning the renovation with your tastes guarantees that the end result is a space where you feel comfortable and relaxed.
- Knowing your preferred style can assist in budget allocation, as some styles may require a higher budget due to material costs or design complexities.
- Your style choice, like a wet room, can impact the renovation’s scope, affecting work complexity and duration due to extensive waterproofing and floor modifications.
- If working with designers or contractors, being able to articulate your preferences clearly ensures a more efficient and satisfactory renovation process.
Once you know what you like, the real planning can begin.
Step 2: Start Planning
Now, it’s time to start planning. Reflect on what you like about your current bathroom. Does it just need a little refresh, or are you envisioning something entirely different? Sometimes, simple changes like new tiles or fixtures can alter the space enough to not need a full remodel. For layout changes, consider the implications on plumbing for toilets, sinks, and showers. Hiring a draftsperson or architect for detailed plans can be helpful, especially to meet state building regulations and codes, like minimum distances between fixtures. Read more in the QBCC’s home owner’s guide to building and renovating PDF.
This is also when you should start making a budget. Your budget should look at:
- Fixtures
- Tiling
- Plumbing
- Electricals
- Waterproofing
Bathroom renovations vary widely in cost, typically ranging from $5,000 for minor renovations to $35,000 for extensive work. Always include a contingency plan, which should be about 10-20% of your budget, for unforeseen expenses. This planning stage is crucial for a successful, well-budgeted renovation.
Step 3: Put Together Your A-Team
Assembling the right team is key to turning your bathroom renovation plans into reality. Start by identifying the types of contractors you’ll need – typically a builder, plumber, electrician, tiler, waterproofer, and possibly a painter. Seek recommendations from friends or look at online reviews to find reputable professionals! Verify their credentials, experience, and ensure they are licensed and insured. We have over 1000 5* Google reviews, so if you’re on the Gold Coast you know you can trust us for your bathroom renovations!
It’s also wise to get multiple quotes to compare services and prices. Discuss your vision and plans in detail with your chosen contractors, ensuring they understand your expectations. Good communication is crucial for a smooth renovation process. Remember, the cheapest option is rarely the best; focus on finding contractors who offer quality, reliability, and fair pricing.
Step 4: Let the Games Begin
Now is when the real work starts – the demolition phase. If you’re planning to keep the existing layout of your bathroom while updating fixtures and surfaces, the demolition can be more selective. However, a full-scale remodel usually requires more extensive work.
This involves removing old fixtures, tiles, and surfaces, along with demolishing any unnecessary walls. For bathrooms with showers, this includes taking out the doors and bathtub. You might opt to store these items for future use. If so, ensure they’re thoroughly cleaned and dried to prevent damage from prolonged moisture exposure.
During this phase, your chosen contractors will also ensure to disconnect all electricity alongside ensuring that all water inlets are switched off or capped – for obvious reasons!
Step 5: Rough-In Plumbing
Rough-in plumbing and electrical installations are the next crucial steps in your bathroom renovation.
For plumbing, the plumber strategically cuts holes in wall studs of timber-framed houses to run pipes, ensuring supply and drainage at needed locations. If using steel frames, pre-made holes typically accommodate plumbing needs. It’s vital that pipes are securely fastened to the frame to prevent ‘water hammer’, which can cause mechanical damage over time.
Electrical rough-ins involve planning for lighting, power points, and any other electrical requirements. Just like plumbing, any substantial alteration to wall studs for electrical wiring must be repaired or reinforced to maintain structural integrity. Electricians carefully plan and mark the locations for fittings to ensure accuracy before the final wall setup.
Both these steps lay the foundational systems of your bathroom, ensuring functionality and compliance with Australian/New Zealand standards.
Step 6: Install Wall and Floor Tiles
With the fixtures in place, the next step is tiling. Expert tilers will transform your space, whether it’s following the existing layout or crafting a new one from scratch. They’ll meticulously measure and plan the layout, using high-quality, durable, and easy-to-maintain tiles suited for the unique demands of a bathroom environment.
Step 7: Install Cabinets and Countertops
The installation of cabinets and countertops is where design meets functionality. Your team will assist in selecting the right materials that balance aesthetics with practicality. Whether you opt for custom-built cabinetry or pre-built units, they will ensure a seamless fit into your bathroom’s design. Countertops are chosen for their durability and ease of maintenance, with stone being a top choice due to its fantastic aesthetic alongside unparalleled durability. Laminate is another popular choice due to its lower price point, but it is less durable than stone.
Step 8: Install Plumbing Fixtures
After demolition, the next step is usually to install new plumbing fixtures: the sink, toilet, shower, and bathtub. Your chosen plumber will run the necessary plumbing lines, which might involve cutting through exterior walls or studs. For non-replacement tubs or showers, your waterproofer will also install a waterproof membrane on walls and floors.
Step 9: Install Lighting and Accessories
This involves installing lighting fixtures and bathroom accessories. This step is crucial in setting the mood and functionality of your renovated bathroom. From stylish and practical lighting to essential accessories like towel rails and toilet roll holders, each element is carefully selected and installed to complement the overall design. Personal touches like artwork or plants are encouraged to give your bathroom a unique and homely feel.
Step 10: Cleaning and Quality Assurance
Experienced professionals from DCM Plumbing and associated trades will meticulously check each aspect of the renovation, but it’s always wise to test the work yourself!
Ensure that:
- All plumbing installations, including pipes, fixtures, and connections, are leak-free and function correctly
- All tiles are properly laid and fixtures are correctly installed and aligned
- All electrical installations, such as lighting and power outlets, are safe and operational
- Areas subjected to water exposure are thoroughly waterproofed to prevent future moisture issues
- The quality of finishes, including paint, cabinetry, and accessory fittings, align with your design vision and are free of defects
This final inspection guarantees that your renovated bathroom not only looks great but is also safe, functional, and built to last. Any minor adjustments or corrections identified during this phase should be promptly addressed to ensure your complete satisfaction with the end result.
Step 11: Tidy Up and Call It a Day!
Once the final inspection is complete, the last step is a thorough cleaning to ensure your new bathroom is pristine. While the contractors will do most of the cleaning, there will inevitably be some more to do before your bathroom is sparkling clean and ready to go!
- Start by clearing out any construction materials and sweeping or vacuuming to remove dust and debris.
- Wipe down all surfaces, including tiles, fixtures, cabinets, and countertops, with appropriate cleaners to remove installation marks.
- Clean and polish all fixtures such as taps, showerheads, and handles.
- Mop the floor, focusing on grout lines and areas around fixtures.
- Make sure all surfaces are dry and safe to use, ensuring a slip-free environment.
And there you have it! 10 steps to an epicly renovated bathroom. Be sure to contact us today if you need a bathroom renovation plumber on the Gold Coast!
In this article, we look at how to fix a leaking mixer tap.
Leaking mixer taps are more than just a nuisance; they’re silent contributors to water wastage and high utility bills. Unlike standard pillar taps, mixer taps combine hot and cold water streams, presenting unique repair challenges. Equipped with the right tools and our straightforward instructions, however, you should be able to fix this issue. Keep reading to learn everything you need to know about how to fix a leaking mixer tap.
DCM Plumbing is the best plumber on the Gold Coast. We are available 24/7 for all your plumbing needs. With 1000+ 5* Google reviews and 35 years of experience, we are known as the best for a reason. Got a blocked drain? Need help with leak detection? Want to learn how to clear a blocked drain? We can help.
What Is a Mixer Tap?
These are some of the most common tap types in the modern home. Instead of two separate taps providing hot and cold water individually, mixer taps blend cold and hot water, providing water at just the right temperature. Often, there is one hot and one cold handle which you turn individually to reach your desired temperature. We will refer to these as dual handle taps. There are also taps with a single handle that provide a smooth gradient for choosing the temperature you want. We will refer to these as single handle taps. Mixer taps are commonly found in both kitchens and bathrooms. Find out more about the types of taps.
Identifying the Issue
In order to fix your mixer tap, you first need to diagnose the issue, as this affects the parts that need to be fixed. The two main culprits of leaking mixer taps are faulty washers/O-rings or a faulty cartridge, and these vary by tap. Here’s how to diagnose the issue for yourself:
Diagnosing a Faulty Washer or O-ring
Generally speaking, if your tap is leaking from the base of the handle, then a faulty washer or O-ring is the likely culprit. Make sure you purchase a correctly sized O-ring or washer for your tap.
Diagnosing a Faulty Cartridge
If your tap is leaking from the opening, then a faulty cartridge is the likely culprit. Make sure you purchase the correct cartridge type for your tap before beginning repairs.
Tip: take a photo of your tap to show the staff at your local Bunnings, Reece or plumbing supply store for specific advice.
Tools and Supplies Needed
Here’s what you’ll need:
- Shifter spanner (adjustable wrench)
- Flat-head screwdriver
- 2mm to 2.5 mm Allen key (hex wrench), depending on your tap model
- Replacement parts (cartridge or washer/O-rings depending on your tap)
- Inox or WD-40
- Thread seal tape (plumber’s tape)
- Rag and bucket
Knowing the exact make and model of your mixer tap is vital to find the right replacement parts.
Step-by-step guide: How to fix a mixer tap leak
Fixing a leaking mixer tap can be a straightforward DIY task however you might face some complications along the way. If you’re struggling to fix the leak, take a look at the common challenges part of this blog for advice.
Step 1: Turn Off the Water Supply
Luckily when just fixing a tap, you usually don’t need to turn off the water supply to your home.
First, look under the sink to find the isolation valves. These are usually small, round or lever-type valves attached to the flexi hoses that supply water to your tap.
To shut off the water, turn these valves until they’re tightly closed. You’ll usually need a flathead screwdriver for this. If they’re lever-type valves, turn the lever so it’s perpendicular to the pipe.
After turning off the valves, turn on the tap to ensure no water flows. This confirms that the water supply has been successfully cut off. Initially, when you turn off the water supply and start dismantling the tap, there might be residual water in the pipes or the tap itself. Have your bucket and rag ready to catch this water in case this occurs.
Step 2: Remove the Tap Handle/s
The way to remove a tap handle or handles varies from tap to tap, but the main goal for every tap is the same: find and remove the grub screw.
For many single handle mixer taps, the grub screw is located beneath a cap/plastic covering on the handle itself. Use a flat-head screwdriver to gently pry it off. This is usually the hot/cold indicator on the tap.
If your single handle tap doesn’t have a hot/cold indicator button, the grub screw might be hidden on the outside of the handle body, usually directly opposite the finger of the handle.
If you have a dual handle mixer tap, then the screws might be under the plastic hot/cold caps on either handle, or located somewhere else on the body of the handles.
Once you’ve found the screw that keeps the handle in place, unscrew it using your Allen key and your tap handle should come straight off. Tip: make sure to plug the sink before taking out the screw in order to not lose it down the drain!
Some models may have a different mechanism for handle removal. If this is the case, find the manufacturer’s guide for further instructions.
Step 3: Dismantle the Tap
With the shifter spanner (adjustable wrench), loosen and remove the tap cover, if necessary. This can be done by hand if the cover is not screwed on too tight. The cover is the domed ring usually located directly beneath the handle of a single handle mixer tap. Be careful not to damage the surface. This step is not necessary in dual handle mixer taps.
Once this is done, you can unscrew the cartridge valve and proceed to the next step.
If you have a dual handle mixer tap, you can simply unscrew the spindle or cartridge valve with your shifter once the handles have been removed.
Step 4: Replace or Clean the O-ring/Washer or Cartridge Valve
Once you’ve removed the cartridge valve or spindles, we recommend examining the parts and replacing any that might be faulty, including the washer, any O-rings, and/or the cartridge valve itself. This ensures you fix the problem and won’t need to do it again for a long while! Make sure to take stock of the parts you’ve removed from your tap and that you have the right replacement for each.
Step 5: Reassemble the Tap
After replacing all necessary parts, reassemble the tap in reverse order. Ensure everything is tight, but don’t over-tighten as this can cause damage and lead to more leaks further down the track. Hand-tight is usually more than sufficient.
As you reconnect each component, apply thread seal tape to the threaded connections for a secure, leak-free seal.
Step 6: Test Your Work
Turn the water supply back on and test your tap. Check for smooth operation.
If at any point you feel unsure, remember that DCM Plumbing is here to help. With just a call, our expert team can take over and ensure your mixer tap is fixed with professional care.
Common Challenges and How to Overcome Them
Even with the best preparation, you might encounter some common issues when fixing a leaking mixer tap. Here’s how to handle them:
Stuck Components
Over time, parts of the tap can become stuck to move due to mineral deposits or corrosion. Apply a bit of Inox or WD-40 and wait a few minutes. This should help loosen the parts.
Choosing the Right Replacement Parts
Identifying the right cartridge, O-rings or washer for your tap can be tricky. If you have the time, dismantle the tap first and bring all the parts with you to Bunnings, Reece, or another plumbing supply store. This way you’ll know you’re getting the right parts!
Avoiding damage to the tap’s finish
Use a rag or cloth when using the shifter spanner to protect the tap’s surface from scratches.
Dealing with persistent drips after repair
If the tap continues to drip after you’ve replaced the parts, this could mean the seating (part of the tap body where the washer or cartridge sits) is damaged. In this case, it might be best to consult a professional plumber.
Ensuring a tight seal
After reassembling the tap, make sure all connections are secure to prevent future leaks. However, be cautious not to over-tighten, as this can damage the parts.
When to Call a Professional
DIY plumbing can be rewarding, but there are times when calling in a professional is the safest and most efficient option. Here’s when you should consider getting in touch with a plumber who has expertise in fixing leaking taps:
Complex Tap Mechanisms
If your mixer tap has a particularly intricate design or you’re unable to identify the issue, professional expertise will save time and prevent potential mishaps.
Persistent Leaking
Should the leak continue despite your best efforts, it could indicate a deeper issue within the plumbing system that requires specialist tools and knowledge.
Damaged Tap Seat
If you discover that the tap seat (the area where the washer or cartridge sits) is damaged or worn out, this often requires reseating or replacement by a skilled plumber.
Lack of Proper Tools
Certain repairs may need specialised tools that are not commonly found in a standard toolbox. In such cases, a plumber’s toolbox can make the job quicker and more effective.
Emergency Situations
If the leak has led to flooding or significant water damage, it’s crucial to call an emergency plumber immediately to prevent further damage to your property.
If you live on the Gold Coast, Australia and need an expert to fix your leaking tap, our team at DCM Plumbing has over 15 years of experience.
Contact us today to speak with a member of our friendly team!
In this article, we look at all the most common types of taps, explaining everything you need to know about them and which might be best for your situation.
Have you ever given a second thought to the humble tap? Many people haven’t, but behind the functional design lies a world of choices, each tailored to specific needs and aesthetics. Whether revamping your kitchen or sprucing up the bathroom, selecting the right tap makes a world of difference. Let’s take a look at the types of taps commonly available, and find the one that resonates with your space.
9 Common Tap Types
Let’s take a look at some of the most common tap types used in homes across the world.
1. Pillar Taps
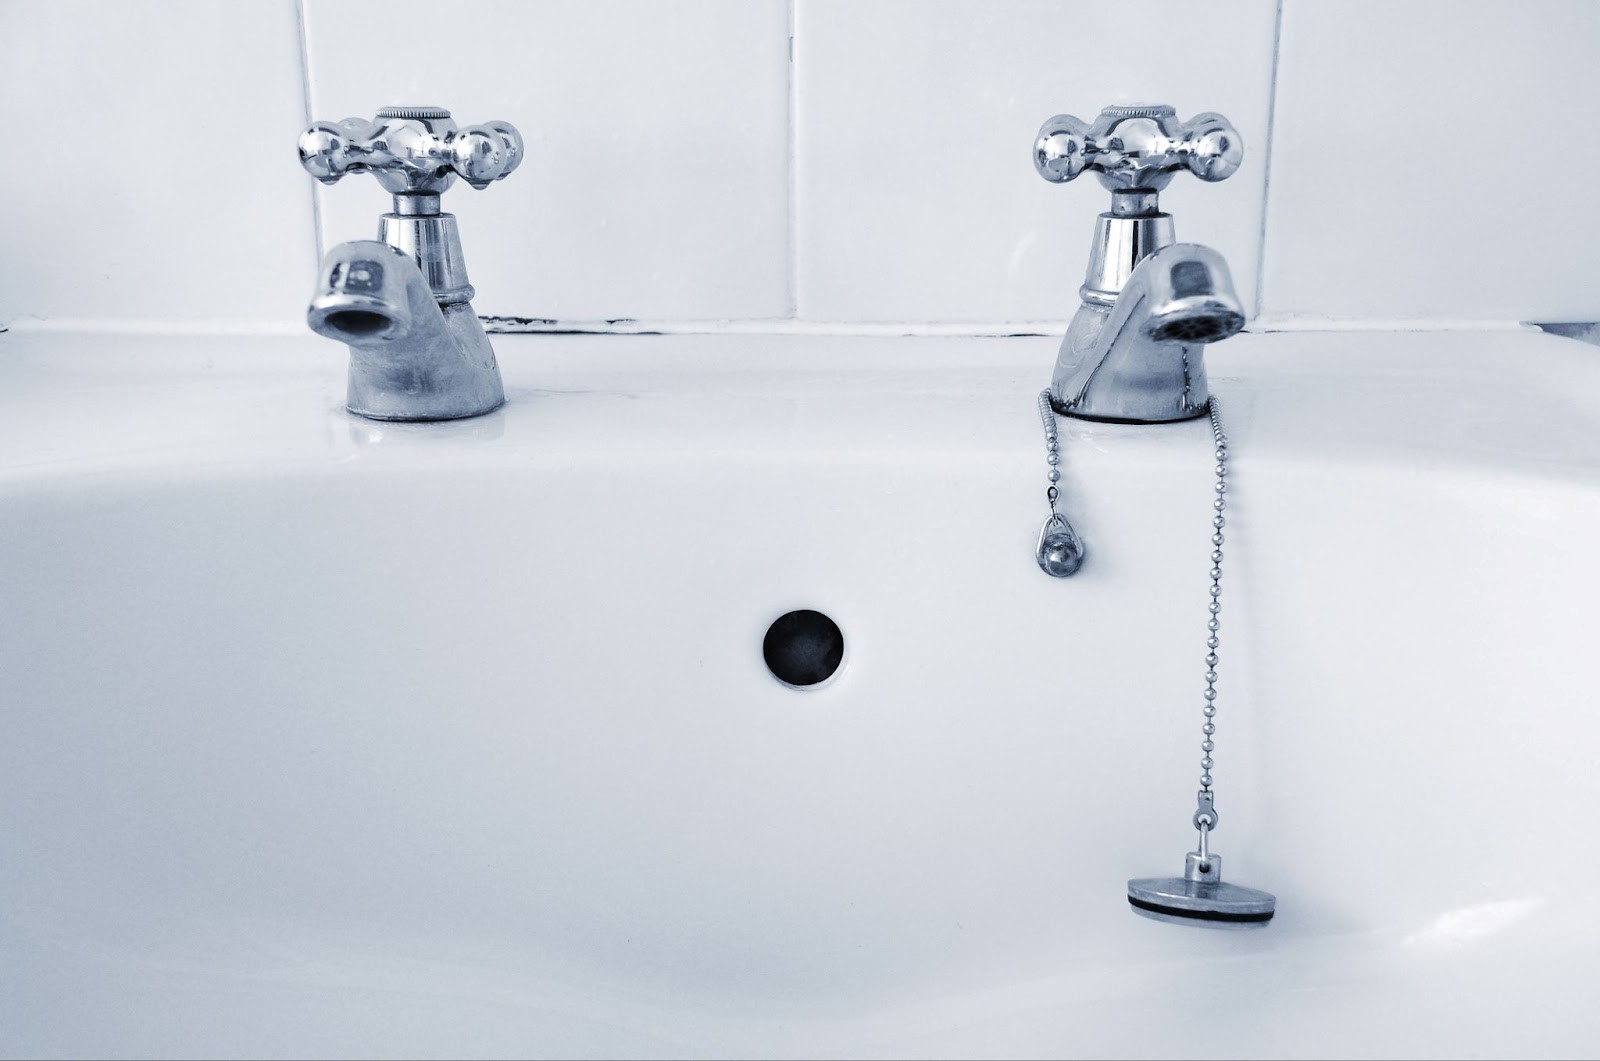
Generally, if you’re looking at two taps – one for hot and one for cold – you’re looking at pillar taps. These taps are usually found in older homes. While they ooze old-school charm, they don’t offer the ease of temperature control of their modern counterparts. The double spouts can mean a higher volume of water is released over a set period of time, making them a decent choice for bathtubs.
2. Mixer Taps
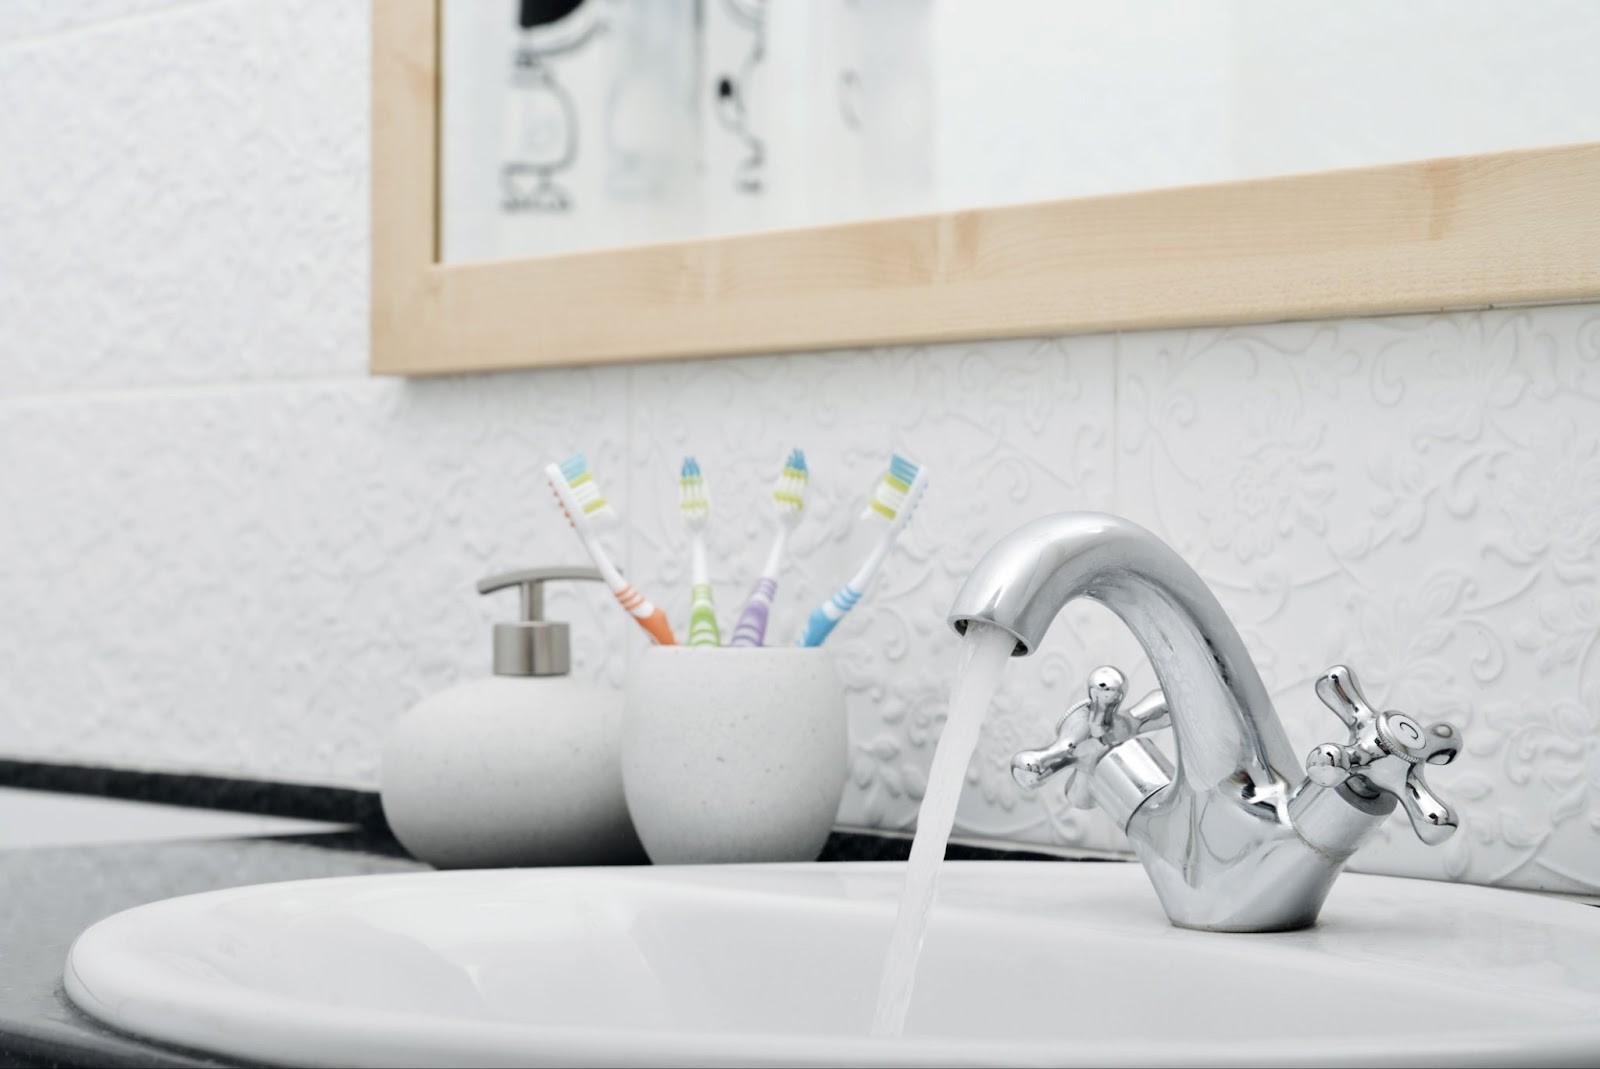
These are some of the most common tap types in the modern home. Why have two taps when one can do the job? Mixer taps seamlessly blend cold and hot water streams, providing water at just the right temperature. They’re commonly found in kitchens and bathrooms.
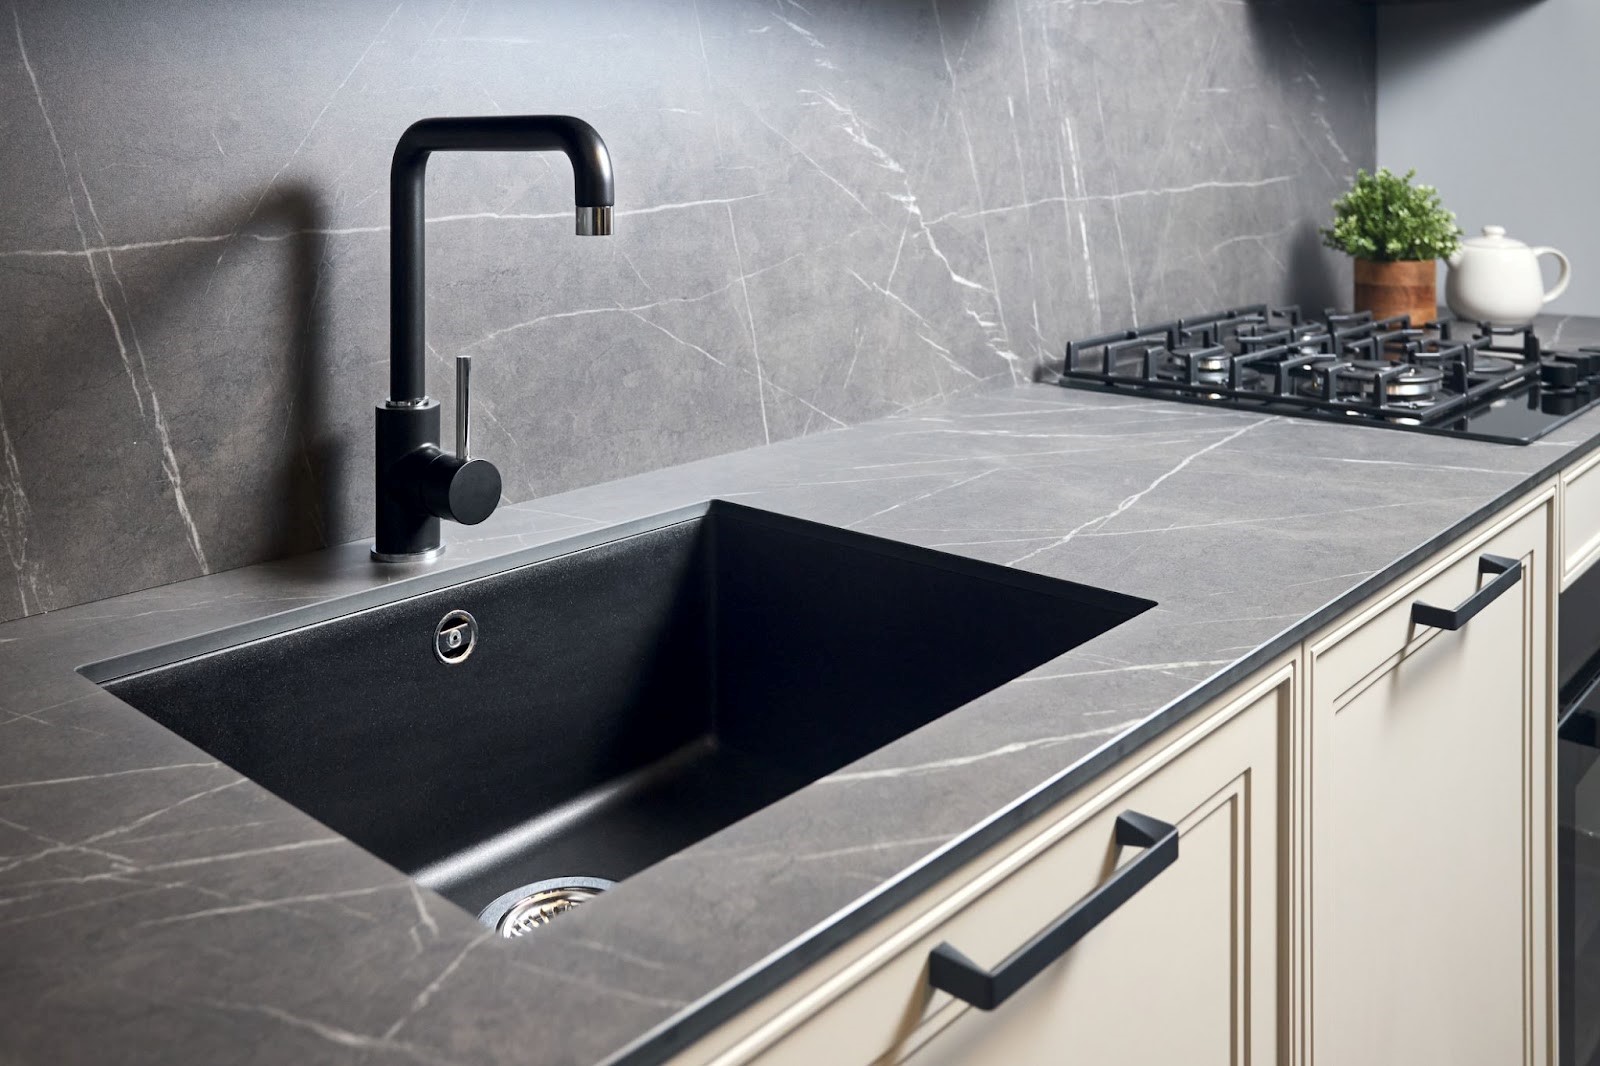
3. Monobloc Taps
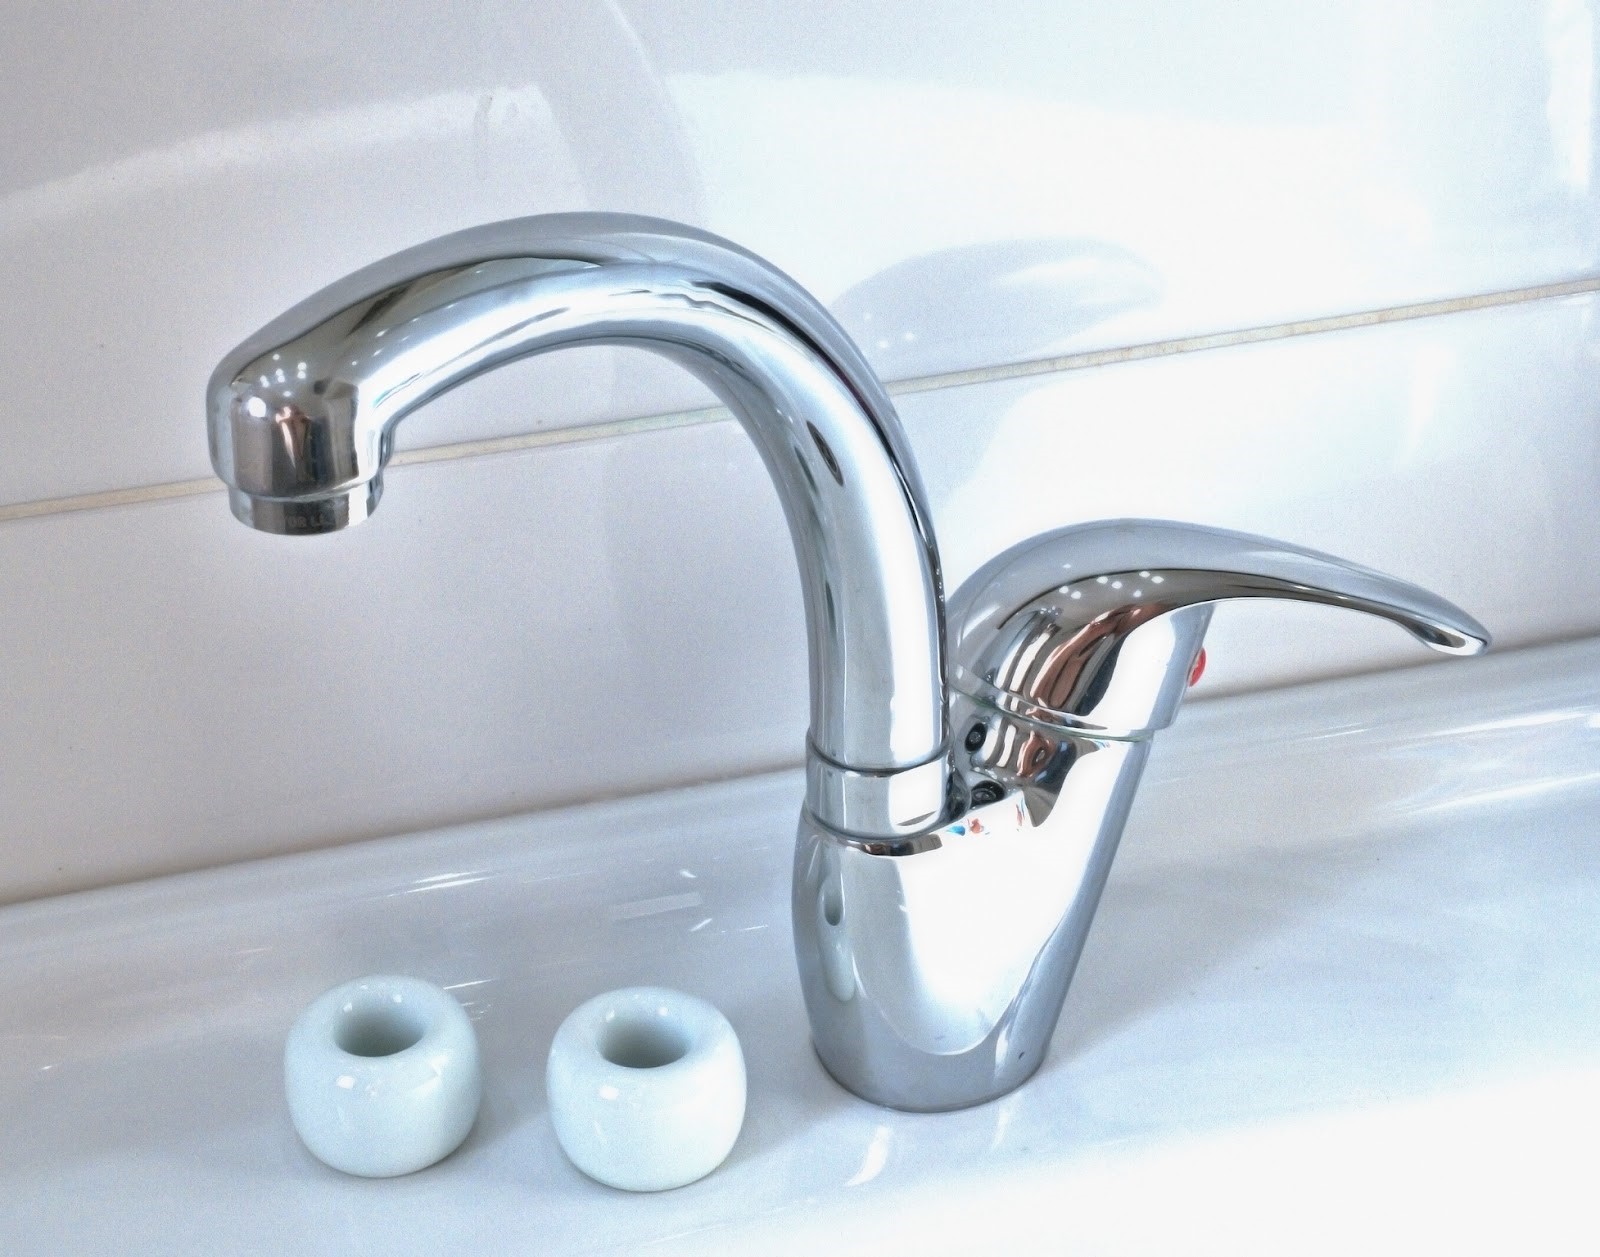
Stylish and sleek, monobloc taps operate with a single handle controlling both the water flow and temperature. These taps require a single hole in the basin or sink, making them perfect for that minimalist aesthetic.
4. Wall-Mounted Taps
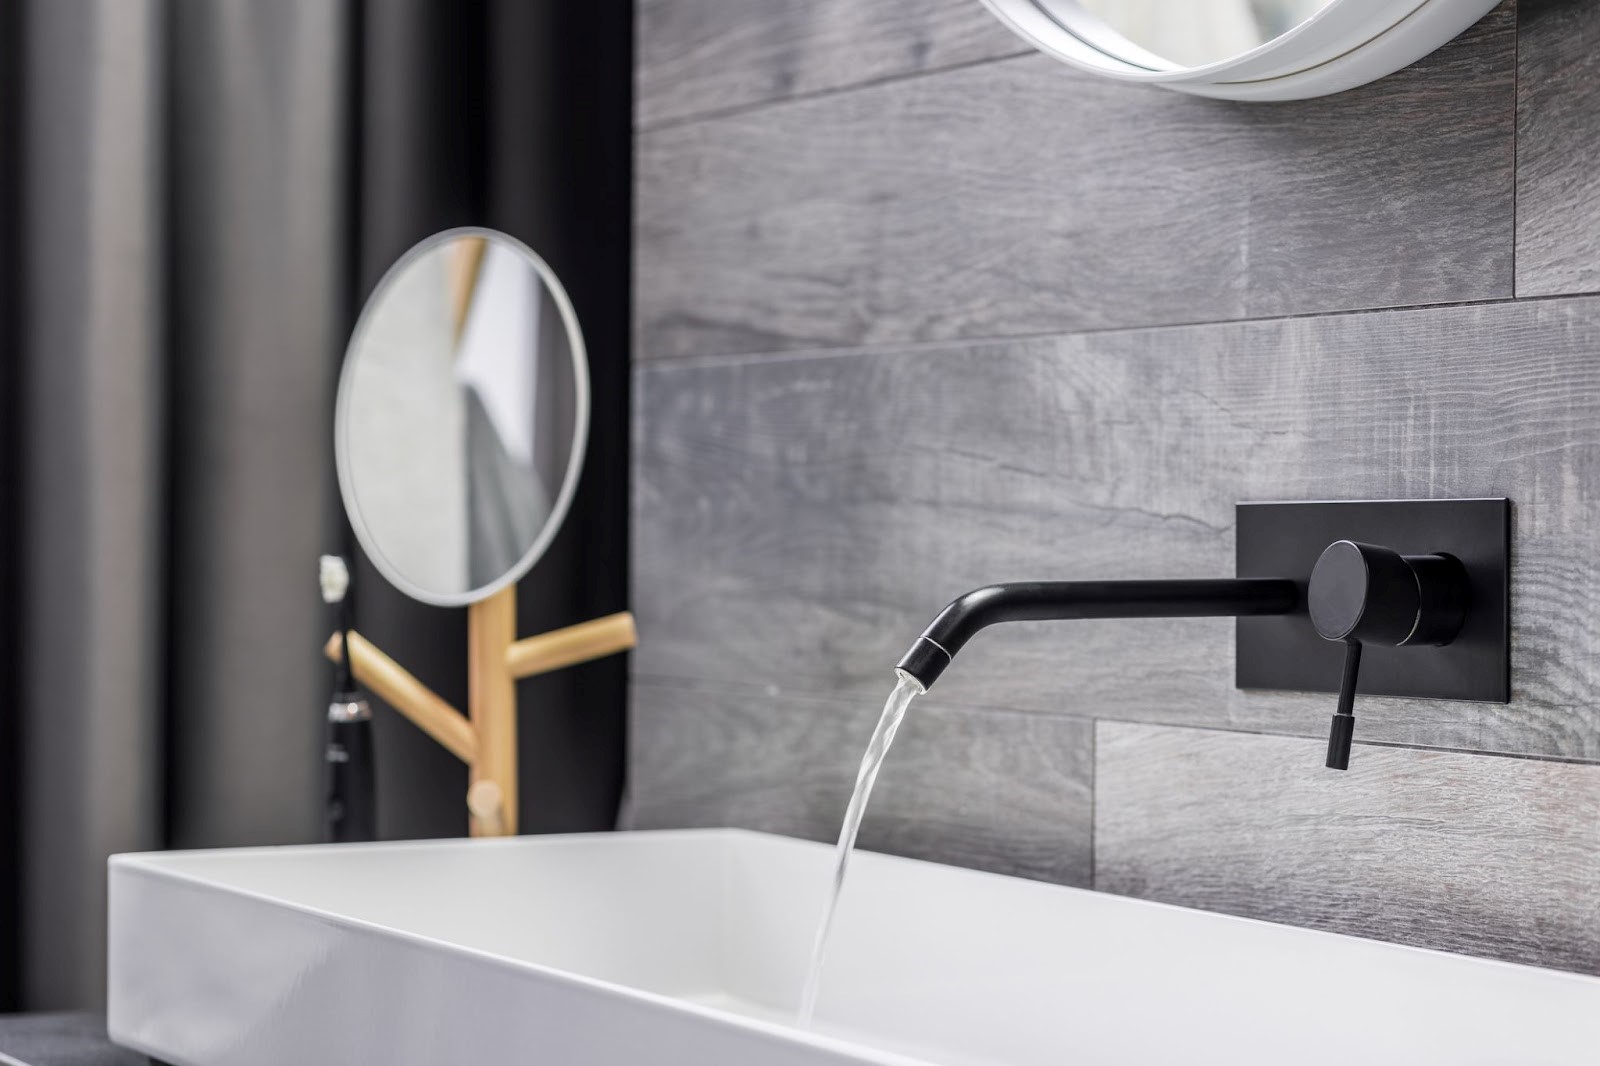
Floating vanities and freestanding baths have given rise to wall-mounted taps. Rather than being mounted on the sink or bath, they’re fixed on the wall, offering a clean and uncluttered look. A heads up: these taps need a lot more planning as the plumbing is hidden behind the walls.
5. Freestanding Taps
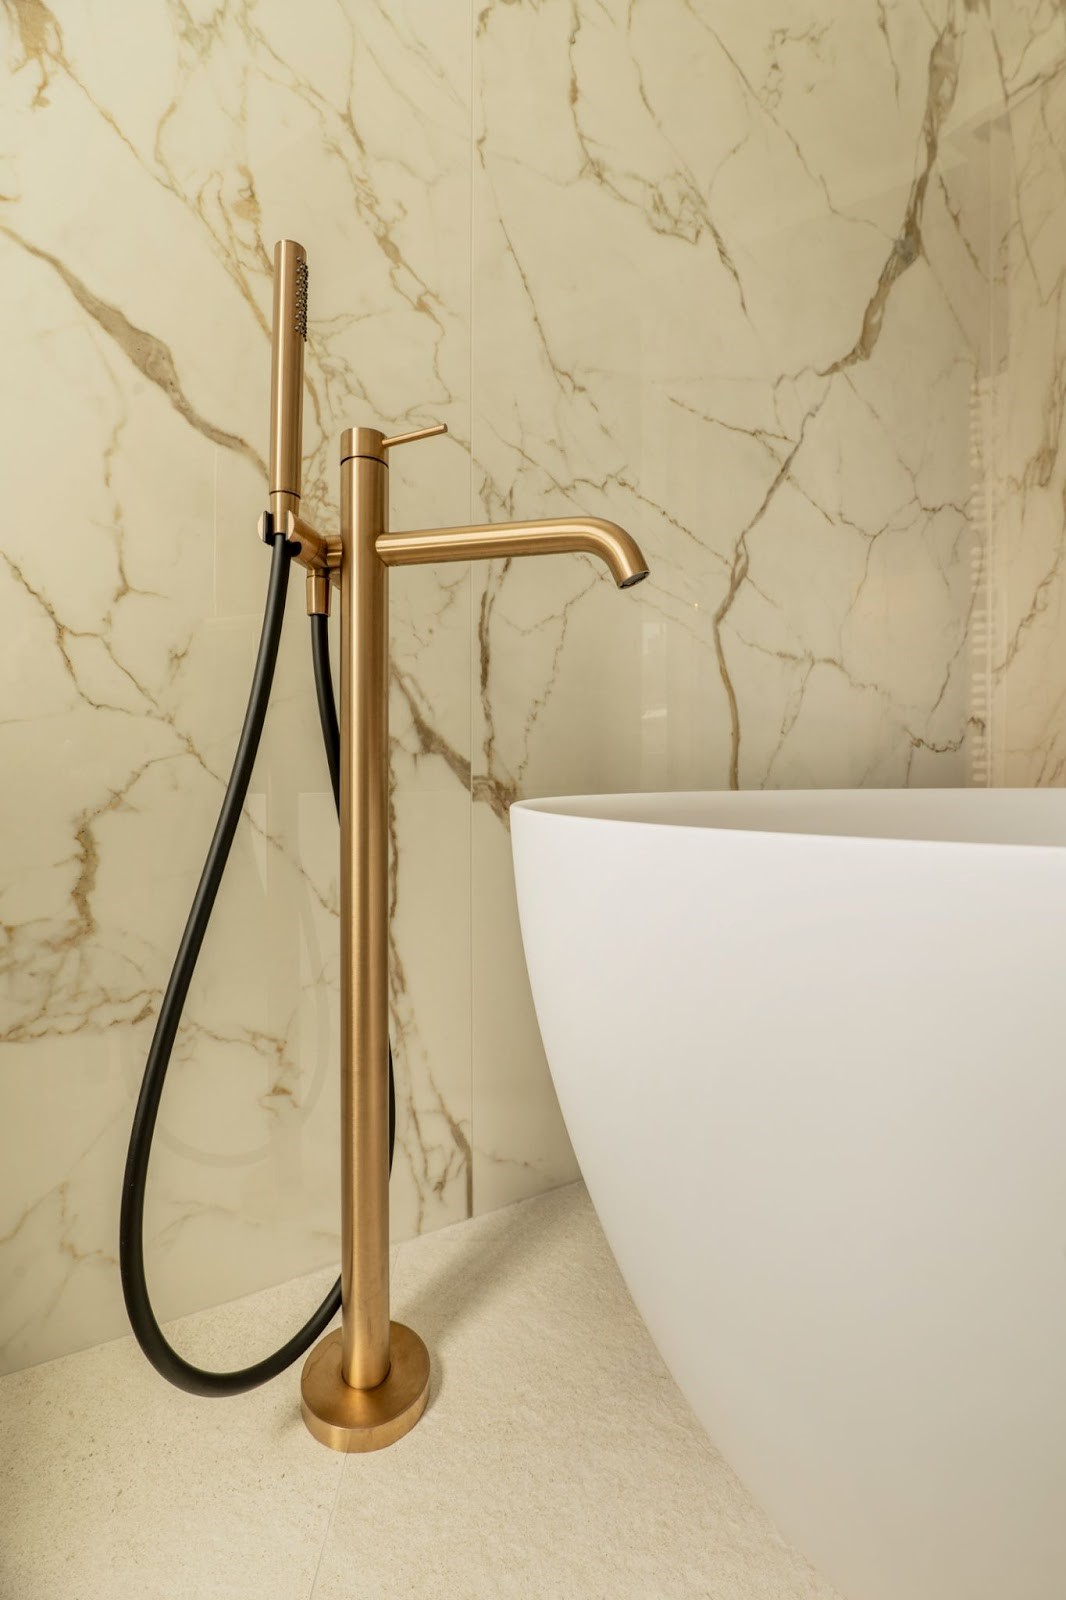
Ideal for freestanding baths, these taps stand tall and proud on the bathroom floor. They give off an air of luxury and are perfect for those indulgent soaks on a Friday night, wine in hand.
6. Pull-Out and Pull-Down Taps
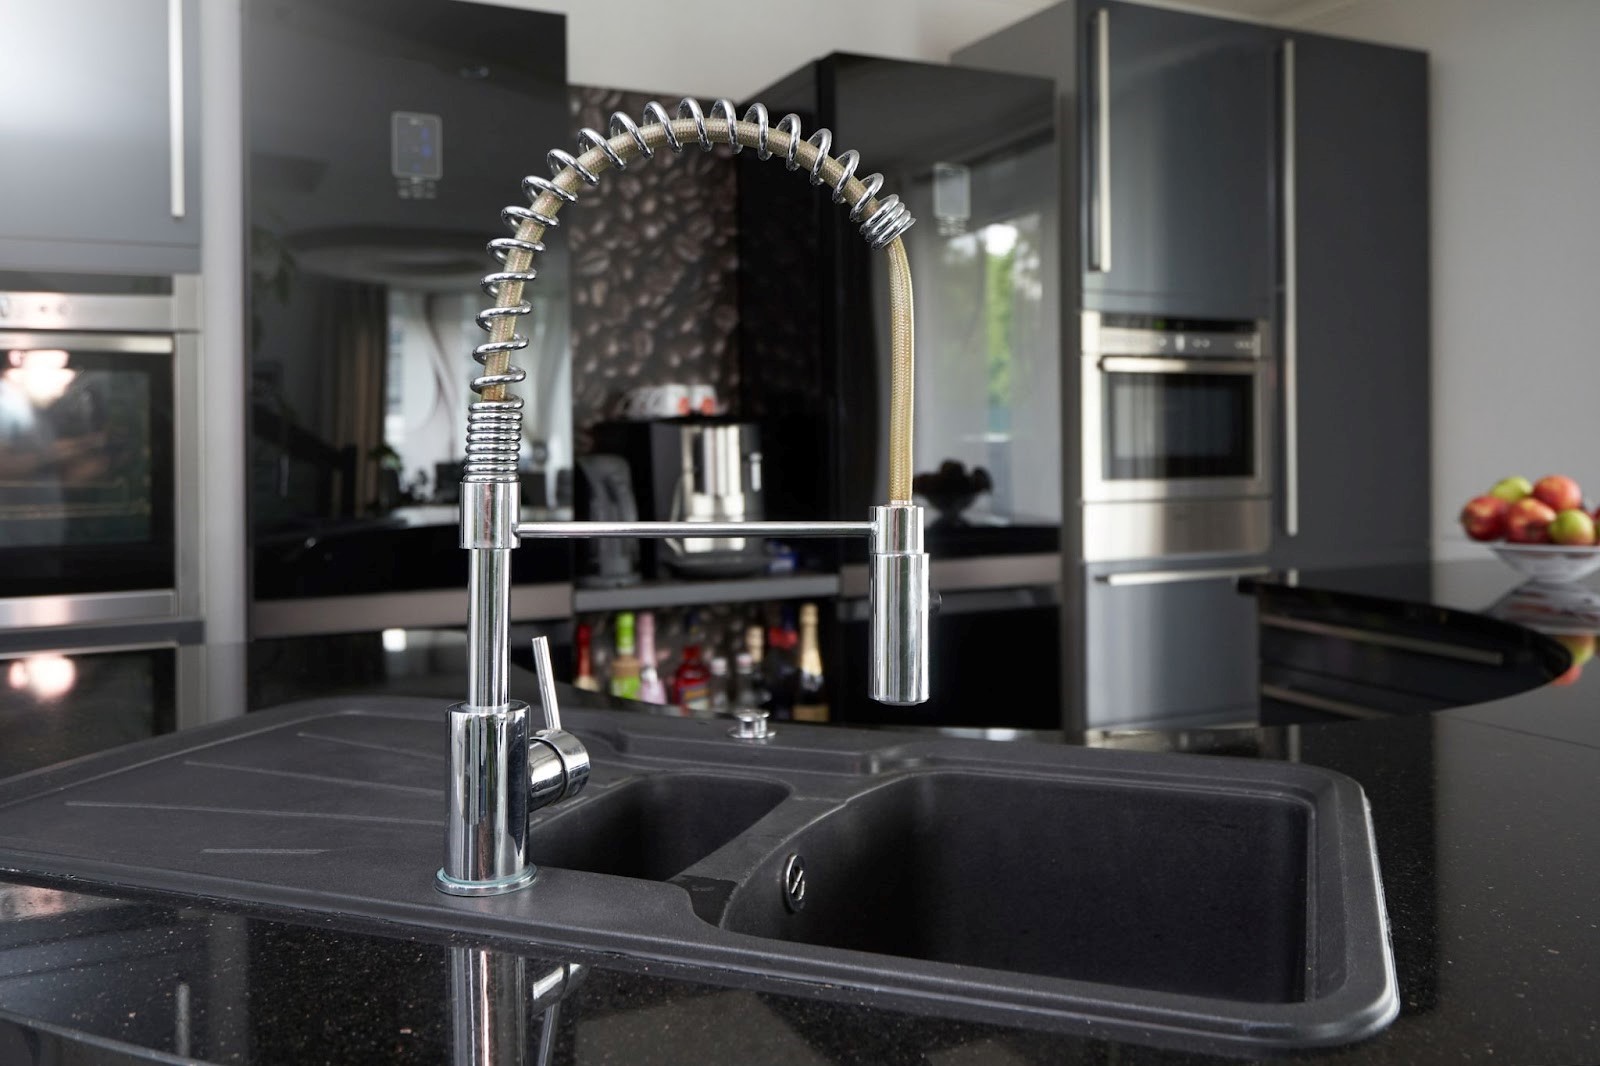
Popular in kitchens, these taps extend to reach those far-off spots in your big sinks or to fill pots on the countertop. Highly functional and flexible, they’re a cook’s best mate.
7. Disc Taps
These modern taps use two ceramic discs that slide over each other to regulate water flow and temperature. Not only are they sleek and stylish, but their mechanism is also known to be more durable than traditional washers.
8. Sensor Taps
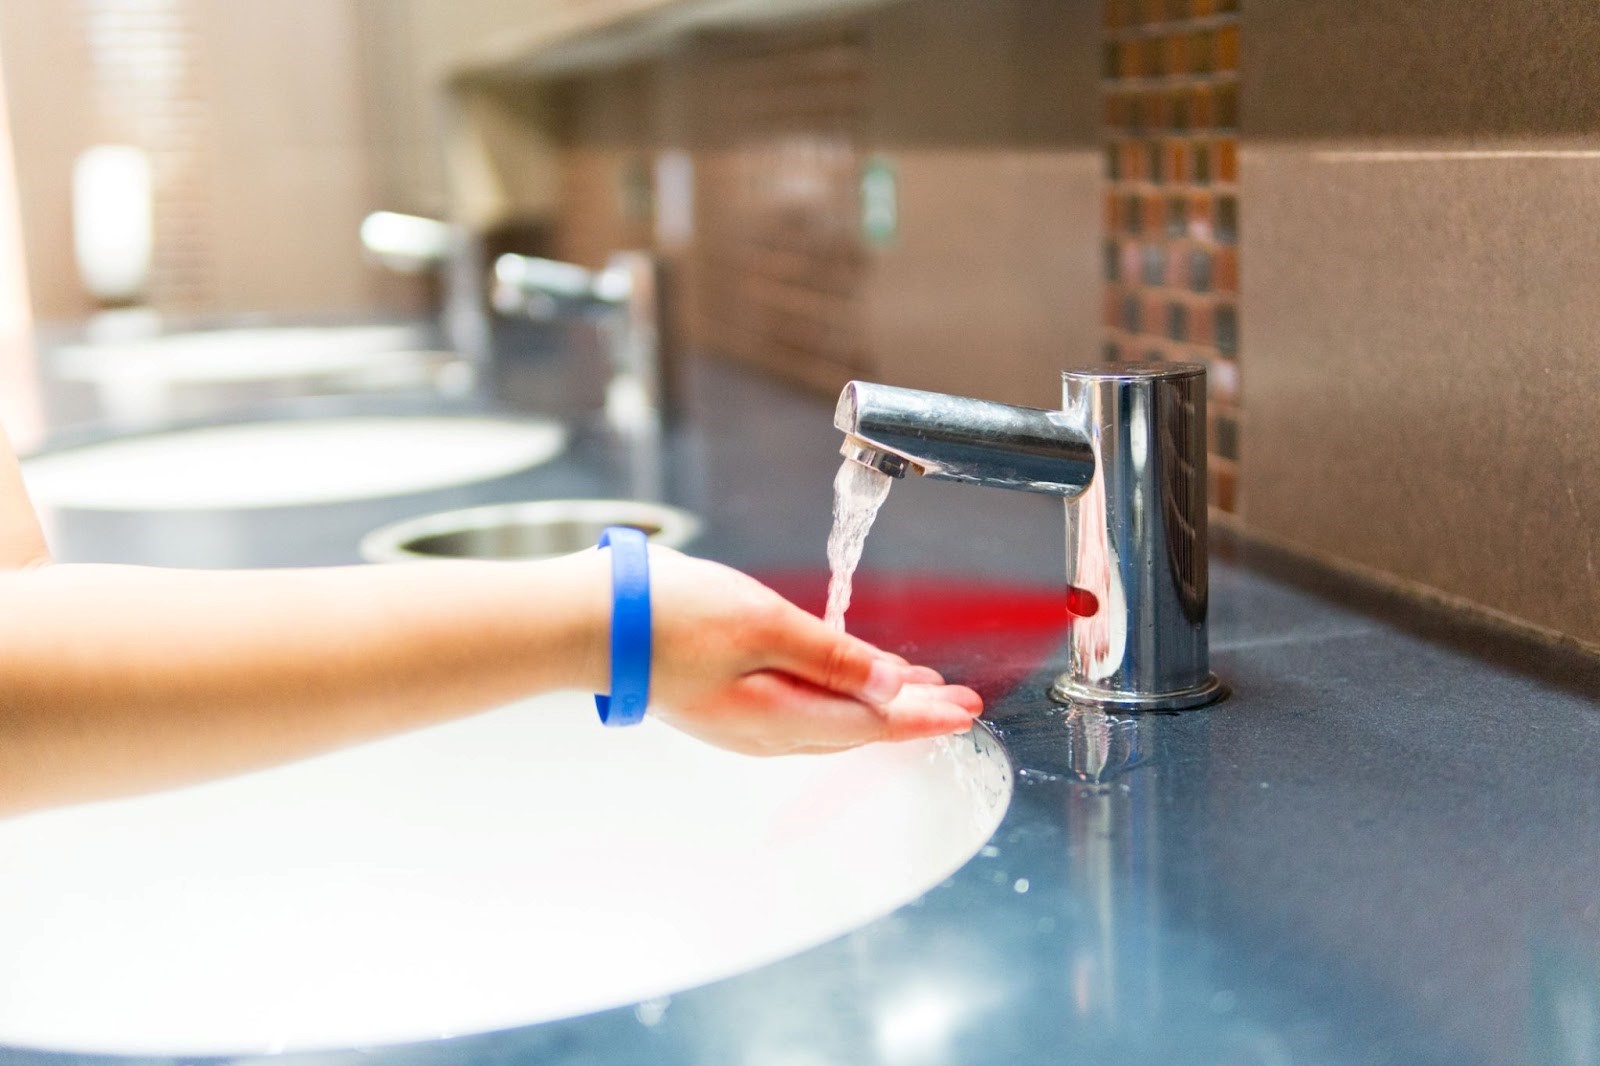
You’ve probably seen (or awkwardly waved your hands under) these in public restrooms. Using infrared sensors to detect hand movement, they release water only when needed, promoting water conservation.
9. Ball Taps
Ball taps, predominantly found in kitchens, use a ball joint to control both the flow and temperature of the water. A single handle does all the work, moving over a round, ball-shaped cap right above the water spout. While they are sleek and modern in appearance, they commonly spring a leak after a while. However, with technology continually evolving, the more recent models are leak-resistant.
What Is a Tap?
To get down to basics, let’s look at the actual definition of a tap.
A tap is a device that controls the release of liquids, most commonly water – no surprise there. Taps are used to regulate the flow of water in sinks, baths, showers, and outdoor fixtures and have been around since Roman times (although their plumbing systems were tainted with lead – not ideal).
Most taps inside our homes today are what are known as mixer taps – taps that mix both cold and hot water to allow users to achieve a temperature of their choice. The mixer tap was invented by Thomas Campbell and patented in 1880. Find out more about the history of plumbing here.
Beyond their fundamental utility, taps have evolved into intricate pieces of hardware, boasting a myriad of designs, finishes, and technologies to enhance both functionality and aesthetics in modern spaces.
How Does a Tap Work?
When looking to understand how a tap works, there’s one main concept to understand first: water in your home’s pipes is constantly under pressure, meaning it naturally wants to come out. A tap simply prevents the pressure from escaping when closed (or “off”), or relieves some of this pressure when open (or “on”). If you were to put a camera into the spout of a tap that is turned off, you’d spot a small opening with a rubber stopper pressed against it. This stopper is the gatekeeper holding back the water.
The way this works is by making a screw (which is controlled by the tap handle) either push the rubber stopper against the opening, halting water flow, or pull it away, letting water out. This simple mechanism, influenced by both the principles of simple machines and fluid flow, ensures that we get water when we want and can stop it when we don’t. It’s an elegant dance of engineering and physics, all tucked away behind the turn of a handle.
Contact DCM Plumbing for All Your Plumbing Needs
DCM Plumbing is the best plumber on the Gold Coast. We are available 24/7 for all your plumbing needs. With over 900 5* Google reviews and 35 years of experience, we are known as the best for a reason. Got a blocked drain? Need help with leak detection? Want to learn how to clear a blocked drain? We can help.
In this article, we cover the steps you should take when you have a burst pipe.
Pipes are the lifeblood of modern plumbing within both residential and commercial properties, hidden behind the walls and under the floors, silently doing their job. But when they burst, they transform from silent helpers to devastating disruptors, potentially causing extensive damage and structural degradation to your home. It’s imperative to address burst pipes swiftly to prevent further damage and disruptions.
Immediate Steps to Take
As outlined above, if you suspect a burst pipe, a quick response can mean the difference between a minor inconvenience and major property damage. There are 3 easy steps to remember to help you prevent any major issues:
- Turn off your water supply: Doing so will minimise water wastage and reduce damage to the property. Water meters are typically situated near the front of a property, adjacent to either the left or right boundary. Most are positioned at ground level and are concealed by a lid labelled ‘Water Meter’.
- Inspect the property: Look for visible signs of water leaks and make a note of the suspected burst points.
- Contact a professional plumber: Even if unsure, it’s better to contact a professional plumber immediately for advice and necessary interventions.
Once you’ve taken care of the immediate danger, there are other steps you should follow.
Locate and Assess the Damage
Once immediate actions are taken, a more thorough assessment of the damage is necessary. Walking around the property and noting the location of damp spots, listening for running water, and feeling the floors for unusual warmth can help pinpoint the leak’s location. Providing this information to your plumber can expedite the repair process. Learn more about how to find a water leak underground.
Handle Repairs
Undertaking repairs is a critical phase. While minor repairs like tightening a leaky connection can be handled personally, more complex repairs necessitate professional intervention – and remember in Queensland, there are strict regulations in regard to the plumbing work you can perform yourself. Incorrectly handled repairs can lead to recurring issues and long-term damage, so for reliable and efficient burst pipe repairs on the Gold Coast, why not contact us today.
Post-Repair Considerations
Once the immediate crisis is resolved, it’s essential to address secondary concerns. If substantial water loss has occurred, a licensed plumber can assist in completing a water relief application form. This form, submitted to Gold Coast Water, can potentially facilitate reimbursements for water wastage, providing some financial relief.
Preventive Measures and Regular Maintenance
Prevention is always better than cure. Regularly inspecting pipes, especially in older properties, can help identify potential issues before they become a real problem. Understanding your plumbing system, conducting periodic checks, and implementing other preventive measures reduce the risk of burst pipes.
Identifying a Burst Pipe
Recognising a burst pipe is the first line of defence. Here are some signs to look out for.
Signs of a Burst Pipe
- Change in water pressure: A leak in the water main pipe can result in a noticeable drop in water pressure from the taps due to water leaking from the pipe, instead of flowing to the tap.
- Damp or wet marks: Leaks within pipes in walls, ceilings, or floors typically manifest as water stains in the respective areas. Such leaks, sometimes caused by vermin, can be inconspicuous.
- Puddles or boggy areas in the garden: Persistent damp or wet garden areas, particularly in the absence of recent rain, or unusually thriving patches of grass in a mostly dry garden, suggest a potential pipe leak.
- Brown or smelly water: Discoloured or malodorous water from taps may indicate a corroded and potentially leaking pipe within the mains water system.
- Increase in water bills: An unexplained and significant increase in water usage charges may signify a water leak on the property.
- Constant sound of water running: A continuous sound of dripping or running water that doesn’t subside may be a warning sign of water causing damage within the walls of the home.
Detailed information on identifying burst pipes can be found in our blog post on the signs of a burst pipe. When such signs are noticed, it’s crucial to reach out to a plumbing professional immediately to prevent extensive damage.
Burst Pipe Test
There are also a few steps you can take to accurately test if you have a burst pipe:
- Stop using all water in or outside the house (including taps, washing machine, dishwasher and toilets).
- Locate the water meter and make a note of the digits on the meter (including the red digits and dials).
- Re-read the meter in an hour (remember, don’t use household water during this time).
- If the digits have moved, it’s likely that a leak is present.
Turn off the water supply at the meter immediately to avoid excess water usage charges and call a licensed plumber.
Common Causes of Burst Pipes
Identifying the primary cause of your burst pipe is crucial as addressing it can help prevent further issues in the future. Common causes of burst pipes include:
- High Water Pressure
- Corrosion of The Pipe
- Deterioration of The Pipe
- A Blocked Pipe
- Temperature Changes
- Poor Installation
Find out more about the causes of burst pipes.
Contact DCM Plumbing
Managing burst pipes effectively is about being vigilant, responsive, and proactive. Recognising the early signs, responding swiftly, and employing professional services are key components in mitigating the damages associated with burst pipes. Equally important is adopting preventive measures and conducting regular maintenance checks to avoid such incidents.
For professional advice, immediate consultations, or expert repair services, feel free to contact DCM Plumbing. Our seasoned team is on standby to assist you in navigating any challenges related to burst pipes proficiently and promptly.
Kgbo, CC BY-SA 4.0, via Wikimedia Commons
Ensuring the purity and safety of our water supply is an essential component for all council areas. One aspect that plays a crucial role in safeguarding our water supply is the implementation of backflow prevention devices.
These devices protect our drinking water supplies from contamination by preventing potentially polluted water from reentering the system. They are a device that prevents contaminated water from flowing back into the system – hence, “backflow prevention device”!
In various residential, commercial, and industrial settings, backflow prevention devices are more than just an optional add-on; they are a legal requirement.
In this blog, we delve into the intricacies of backflow prevention devices, explore the different types available, and guide you through their essential maintenance practices to ensure your water remains clean and safe at all times (and to make sure you remain a law-abiding citizen)!
Backflow Devices Explained
A backflow prevention device is a crucial component of a plumbing system designed to protect potable (drinking) water supplies from contamination. Essentially, it acts as a one-way gate (or valve), ensuring that water flows only from the public water supply into a home or business, but not back the other way. This is critical because various conditions can create a sudden and unexpected reversal in the flow of water in a plumbing system, known as backflow (more on this later). This reversal can potentially draw contaminants such as chemicals, fertilisers, human waste, and other pollutants into the clean water supply.
There are various situations where contamination can occur, including within pipes that have direct access to the drinking water supply, connected auxiliary water sources, submerged inlets, by-pass arrangements, removable sections, and temporary devices. For instance, if a sprinkler system is connected to the home’s water supply, fertilisers and pesticides could be drawn back into the drinking water during a backflow event (obviously not what we want)!
To counteract this risk, backflow prevention devices are installed at critical points within a plumbing system. These devices come in two main types: testable and non-testable.
Testable devices are designed with valves that can be checked regularly to ensure they are functioning correctly, while non-testable devices are simpler in design but cannot be tested for functionality.
The type of device required depends on the level of risk and the potential for contamination.
What Causes Backflow in Plumbing?
Backflow in plumbing is caused by two primary factors: backpressure and backsiphonage.
Backpressure occurs when the pressure in a non-potable system exceeds the pressure in the potable water supply line. When the pressure in the private system becomes greater than the public system, water can be pushed back into the main supply, potentially carrying contaminants with it.
Water heaters and boilers are frequent sources of backpressure in a plumbing system. As water heats, it expands, leading to increased pressure within the system. In such scenarios, a backflow preventer serves as a crucial barrier, preventing this water from contaminating the public water supply.
Backsiphonage occurs when there is a sudden reduction in the water pressure of the supply system, creating a partial vacuum that can draw water from a home or business back into the public water system.
This can happen during events like a water main break, during rapid withdrawal of water from fire hydrants, or when a supply line is shut down for repairs. If there are points in the system where the water supply is connected to a source of contamination during such an event – like a hose submerged in a pool or a pesticide sprayer attached to a garden hose – contaminants can be syphoned back into the drinking water supply.
These backflow events are not common, but when they do occur, they can pose significant risks to public health due to the potential for water contamination, hence the need for backflow prevention devices.
When is a Backflow Prevention Device Required?
A backflow prevention device is required under the following conditions:
Risk of Pollution
A backflow prevention device must be installed when the plumbing on premises has the potential to pollute either the water supply within the premises or the water supply provided by the water service provider. This is in accordance with AS/NZS 3500.1:2003, which specifies the appropriate backflow prevention device for particular applications.
Local Government Directive
Local governments have the authority to mandate the owner or occupier of premises to install, register, inspect, test, repair, or replace a backflow prevention device. This authority is invoked when the local government reasonably believes that the plumbing on the premises poses a risk of polluting the water supply.
Inspection and Testing
Local governments may, at any time, require the owner of a backflow prevention device to have the device inspected, tested, repaired, or replaced by a licensed person who is authorised to conduct such work. Following an inspection or test, the licensed person must provide the local government with written results within 10 business days.
Testable Devices
For testable backflow prevention devices, local government approval is necessary before installation. Local governments are required to implement and maintain a program for the registration, maintenance, and testing of these devices within their jurisdiction.
An owner of an installed testable backflow prevention device must fulfil two key responsibilities:
a. Register the device with the local government, thereby allowing for the monitoring of these critical devices.
b. Ensure that the device is inspected or tested for operational functionality at least once each year by a person who is licensed to perform this work. This regular testing is critical to ensuring that the device functions as intended and provides the necessary protection against water contamination. Contact us today if you live on the Gold Coast and need your backflow prevention device tested!
How Does Backflow Prevention Device Testing Work?
Backflow testing is a critical process that ensures your device is working as it should. During this test, a licensed and accredited backflow prevention plumber conducts a thorough inspection of the device, confirming that it is operating effectively to protect against water contamination. The process involves the following steps.
Preparation
Initially, the plumber will turn off the downstream shut-off valve in the system. After waiting a few minutes for the system to stabilise, they proceed to the testing phase.
Pressure Testing
The plumber uses a specialised backflow testing kit to measure the pressure in the system. This test is crucial, as it ensures that the pressure within the system is at the appropriate level, indicating that the device is functioning as it should.
Device Inspection
The plumber inspects the physical condition of the backflow prevention device, checking for wear, damage, or any other signs that the device may not be operating optimally.
Risk Assessment and Frequency of Testing
A hazard assessment is conducted by the installation plumber to establish the risk level of the property. Properties are categorised into high, medium, or low hazard ratings based on potential risks associated with their water supply systems.
For instance, high hazard properties are those that could pose a potential threat to human life, whereas low hazard properties are those that are generally a nuisance but do not endanger health or wellbeing.
Properties with a high or medium hazard rating must have their backflow devices tested after installation and then annually thereafter. In contrast, low hazard properties are usually fitted with a non-testable backflow device. Many smaller meters (20 or 25 mm) are fitted with a backflow prevention device designed for low-risk use.
Reporting
A licensed person who inspects or tests a testable backflow prevention device must submit the written results of the inspection or test to the local government in the approved form (Form 9) within 10 business days following the inspection or testing of the device.
Maintaining Compliance
For certain properties or situations, such as construction sites, emergency sprinkler or fire service systems, swimming pools, manufacturing facilities, and restaurants with grease traps, the installation of a backflow prevention device is a requirement. Regular testing and maintenance of these devices are mandated to ensure continued compliance with local regulations and safety standards.
Removing or replacing a device
A plumber will notify you if you need to remove or replace a backflow prevention device. This is how the process works:
Initiating the Process
A licensed plumbing contractor is responsible for initiating the removal or replacement of a device.
Notification and Documentation
The contractor must submit a Form 4 to the Queensland Building and Construction Commission (QBCC), which serves as a notice of the work undertaken.
Testing and Reporting
After the device has been removed or replaced, the contractor must complete and submit a Form 9 test report, documenting the condition and functionality of the newly installed device or confirming the successful removal of the old one.
Registration and Fees
The contractor is also required to submit a registration fee for each device to the local Council, along with the completed Form 9 test report. This fee is $73 a year per device.
Council Audits
The Council may conduct audits of device removals performed under a Form 4 to confirm that the hazard requiring the device replacement has been mitigated and is no longer present after the device’s removal.
Contact DCM Plumbing for Your Backflow Testing Needs Today
Backflow prevention devices play a pivotal role in safeguarding our water supply, acting as silent sentinels that protect us from potential contamination. Whether you are a homeowner, business operator, or property manager, staying vigilant about the installation, testing, and maintenance of these devices is a paramount responsibility. Remember to consult with a licensed backflow prevention plumber like DCM Plumbing to ensure that your property remains in compliance with local regulations and that our water remains pure and safe for all to use. Contact us today to find out how we can help.
Want to learn how to unclog a toilet? Here, we give you 9 methods, as well as a few causes of blocked toilets and how to avoid it happening again in the future.
There’s nothing quite as frustrating as a blocked toilet, is there? Not only does it cause considerable inconvenience, but it can also lead to larger, potentially more expensive problems down the track. We are here to help you unclog your toilet and navigate this common household predicament.
With 35 years of experience under our belts and a solid reputation built on over 1000+ 5-star Google reviews, we’re no strangers to blocked toilets or the havoc they can wreak. We’ve seen it all, from minor clogs to catastrophic blockages, and we know exactly what it takes to get your toilet back up and running in no time.
Remember, a blocked toilet isn’t just an inconvenience – it’s a call to action. So, let’s roll up our sleeves and get ready to get rid of blocked toilets for good.
9 Methods to Unclog Your Toilet Today
Here are 9 tried and tested methods to unclog your toilet that you can try on your own without the help of a plumber.
- Plunger: This is the first tool you should reach for when dealing with a clogged toilet. Position the rubber cup of the plunger over the toilet bowl drain and apply downward pressure. Begin slowly and gradually increase the force to dislodge the obstruction. Repeat with short sharp bursts and regularly stop to assess whether water is now draining from the toilet.
- Dish soap: Pour half a cup of dish soap into the toilet bowl. Dish soap can lubricate and break down blockages in the pipe and allow the lodged debris to slide down more easily. Wait a few minutes and then try flushing.
- Hot water: Pour hot (but not boiling) water into the toilet bowl. The heat can help to break down material causing the clog. If the water level goes down, you’ve successfully unclogged the toilet.
- Baking soda and vinegar: Mix one cup of baking soda and two cups of vinegar and pour the mixture into the toilet. Wait about 30 minutes for the fizzing reaction to break down the clog, then follow with a kettle full of hot water.
- DIY drano bomb: Mix two cups of baking soda, eight to ten tablespoons of dish detergent, and a quarter cup of Epsom salt. Let this mixture sit and harden overnight. Drop one of these “bombs” into the toilet bowl along with four cups of water. Wait 30 minutes, then flush.
- DIY drain snake: Unravel a wire coat hanger until it’s straight. Push one end of the wire into the clogged area. Prod the debris until it becomes free and flows down the drain.
- Toilet brush: Use a toilet brush to break up the material causing the clog. Angle the bristles along the pipe’s edges and work your way into the bowl. Once you find the source of the clog, move the brush back and forth to break up the material.
- Plastic bottle pressure: Remove as much water from the toilet bowl as possible. Fill a large plastic bottle with warm water, place your thumb over the top, then fit the top end of the bottle into the toilet’s outlet. Remove your thumb and squeeze the bottle, forcing the water down the pipe. The added pressure could dislodge the clog.
- Wet/dry vacuum: If all else fails, a wet/dry vacuum can be used to suck out the obstruction. Ensure the toilet bowl is drained first so the vacuum is only sucking up the clog.
Remember, if none of these help with your blocked toilet, it may be time to call in a professional. Our experienced team is always ready to help!
Common Causes of a Blocked Toilet
Some common causes of a blocked toilet include;
- Flushing inappropriate items: Flushing items like wipes, paper towels, feminine products, ear swabs, and hair can result in clogs and ongoing plumbing problems. Even products that are marketed as “flushable” can cause issues as they do not degrade as easily as regular toilet paper. Your toilet is not a bin, and treating it as such can lead to blocked pipes.
- New low-flow toilets: Newer homes may have low-flow toilets, which sometimes lack the necessary pressure to push waste material through the drain effectively. This low flushing power and smaller throat can result in material not fully flushing, leading to a perpetually clogged toilet.
- Excessive use of toilet paper: Toilet paper is designed to degrade and flow through the drain without causing blockages. However, if too much is used, or if the toilet paper is thicker and multi-ply, it may not dissolve as well in water, leading to potential clogs.
- Clogged toilet trap: Your toilet has an S-shaped trap, similar to the P-trap found in your sink. The job of this trap is to catch objects and prevent them from clogging the drain line. However, if non-flushable items or excessive amounts of toilet paper are flushed, they can get stuck and stop the trap from functioning properly.
- Blocked toilet vent: Your toilet is connected to a vent that allows fresh air to enter the plumbing system, thereby increasing flushing pressure. If there’s a blockage in this vent, the pressure can drop, leading to recurring clogs. Symptoms of a blocked toilet vent can include gurgling noises, slow draining, and a foul sewer smell in your home.
- Waste and debris buildup: Over time, waste and debris can accumulate in your pipes, causing them to become blocked.
- Tree roots in the drainage system: Tree roots can invade your underground drainage system and cause blockages.
- Cracked or broken pipes: These can prevent waste and water from flowing smoothly, leading to clogs.
- Faulty flush valve seal: If the flush valve seal isn’t working correctly, it can result in weak flushes that don’t effectively remove waste from the toilet bowl.
- Old or unmaintained external pipes: If your external pipes are not maintained or are old and collapsing, they can lead to toilet blockages.
- Slow-moving or unmaintained septic systems: If your home has a septic system, any issues with it, such as slow movement of waste or lack of maintenance, can lead to toilet blockages.
- Hard water issues: Hard water, or water that has high mineral content, can cause buildup in your pipes and lead to blockages.
Contact Dcm Plumbing Today For All Your Blocked Toilet Needs
With these practical and easy methods at your disposal, you’re well-equipped to tackle even the most stubborn blocked toilet. Yet, remember that prevention is always the best cure. Understanding and avoiding the common causes of blocked toilets can save you from the inconvenience and potential plumbing issues in the future. Should your toilet persistently resist these methods, don’t hesitate to call in the professionals. At DCM Plumbing, we’re always ready to assist with your blocked toilet needs. Contact us today!
There are several different types of hot water systems commercially available, and understanding each type will help you to make the right choice for your circumstances.
In this article, we provide a clear understanding of the different options available. We’ll explore the various types of hot water systems, their pros and cons, and the key considerations you need to keep in mind to find the one that best fits your needs. So let’s dive in and discover the hot water system that’s right for you!
DCM Plumbing is the best plumber on the Gold Coast. We are available 24/7 for all your plumbing needs. With over 900 5* Google reviews and 35 years of experience, we are known as the best for a reason. Want some help with your hot water system? Need some leak detection? We can help.
The Different Types of Hot Water Systems
There are two primary types of hot water systems: storage and continuous flow hot water systems. These are then further subdivided into electric, gas, and solar hot water systems. Let’s look at storage hot water systems a little more closely
Storage
Storage hot water systems are straightforward: water is kept in an insulated tank which is then heated and released as needed. The water in the tank is then refilled and reheated as demand dictates.
There are two ways in which these systems move water: mains pressure or a gravity feed (constant pressure).
Mains pressure: When a hot water system is linked to mains pressure it means hot water is delivered at the same pressure and flow rate as your cold water, so more than one outlet can be turned on without affecting overall pressure. The tank is usually stored at ground level, although it can be located either inside or outside the house.
Gravity feed/constant pressure: With a gravity-feed/constant pressure system, water is supplied at a pressure lower than that of the main supply.
In these systems, the amount of pressure available is determined by the vertical distance between the tank (usually kept in a higher part of the house) and the point of use. This type of system is commonly found in older properties and those not connected to the mains water network. These systems are usually a cheaper alternative than their more modern counterparts.
Storage hot water systems usually come with either steel or vitreous enamel tans. Vitreous enamel tanks are by far the most common, as they are cheaper to manufacture and supply, and they handle high temperatures comfortably. While steel can be more durable, it is far more expensive, and steel often varies drastically in the quality, meaning there’s no guarantee of them lasting longer.
Our recommended brand of storage hot water system is Aquamax! We supply and install these all over the Gold Coast.
Pros of storage hot water systems:
- Storage water heaters have extended warranties of 5-10 years and require minimal maintenance.
- Parts and technicians for storage water heaters are easily accessible, simplifying repairs and servicing.
- They often have sacrificial anodes that protect the tanks from corrosion, enhancing their lifespan.
- Vitreous
Cons of storage hot water systems:
- Storage water heaters consume more energy and have higher operating costs due to constantly keeping the water hot.
- They can be expensive to purchase and install, requiring specific accommodations based on energy source and available space.
- Mild-steel tanks can corrode, but regular maintenance can mitigate this issue.
- Heat loss over time and the impact of local water quality should be considered.
- High mineral content or ‘hard’ water and sediment build-up can lead to more frequent repairs and maintenance.
With proper planning and regular servicing, storage water heaters can be a reliable hot water solution.
Continuous Flow/Instantaneous
Continuous flow or instantaneous systems provide an innovative solution to heating water, offering efficient performance with reduced energy loss compared to traditional storage systems. These systems heat water on demand, eliminating the need for a storage tank. This means they can operate on various fuel sources such as natural gas, LPG, or electricity and come with different ignition modes, either electronic or pilot flame-based.
Pros of Continuous Flow/Instantaneous Water Systems:
- Efficient performance with reduced heat and energy losses compared to storage systems.
- Continuous supply of hot water, as it is heated on demand.
- Advanced temperature controls allow users to set the desired water temperature at the point of use, saving energy and reducing the risk of burns or scalding.
- Can operate on various fuel sources, including natural gas, LPG, or electricity.
- Available in both externally and internally mounted options, depending on suitable ventilation.
Cons of Continuous Flow/Instantaneous Water Systems:
- Inconsistent temperatures – it’s much easier to heat a tank of water to a specific temperature than to maintain a constant temperature in an instantaneous system.
- Internal installation requires proper ventilation.
- Purchase and installation costs may be higher compared to traditional storage systems.
- May require adjustments for the energy source and tank installation, potentially adding to the overall cost.
- Water quality and sediment buildup can impact performance and increase the need for maintenance and repairs.
Now, let’s look at how these two primary types of water heaters are then subdivided into electric, gas, solar, and heat pumps.
Electric
Electric hot water systems work by employing an electrical heating element to increase the temperature of the water and can be either storage or instantaneous hot water systems.
Now let’s explore some advantages and disadvantages of electric hot water systems.
Pros:
- Electric hot water systems can be either storage or instantaneous, fitting a variety of household needs.
- They’re common, so parts and service are easily available.
- Can be paired with solar panels to utilise solar energy, reducing electricity costs and carbon emissions.
- When paired with a solar PV system, they can be scheduled to operate when solar energy production is highest.
Cons:
- Electric storage water heaters, unless powered by a solar PV system, generally consume more energy compared to gas or solar water heaters.
- These heaters typically have a higher carbon footprint as they are dependent on grid electricity, which in many areas is still primarily generated from fossil fuels.
- Electric hot water systems are often more expensive to run, particularly those connected to a day-rate tariff.
- Certain regions restrict the installation of high greenhouse gas-emitting hot water systems in new buildings or in certain existing structures.
- The initial purchase and installation cost can be high, especially for models that require extensive wiring or special accommodations.
Gas
Gas hot water systems use natural gas or liquefied petroleum gas (LPG) as fuel to heat water and can operate via both storage or instantaneous methods.
Now, let’s break down some of the pros and cons of gas hot water systems:
Pros:
- Gas storage systems can heat the water in the tank quickly, often requiring a smaller tank than an equivalent electric storage system.
- Natural gas water heaters produce fewer greenhouse gas emissions than traditional electric water heaters that use non-renewable electricity.
- These units provide hot water on-demand, eliminating the need for a storage tank and reducing the chance of running out of hot water.
Cons:
- Due to safety reasons and the nature of gas combustion, gas water heaters often have less insulation, leading to higher heat losses.
- High-demand gas systems may require the installation of larger gas pipes and meters, increasing installation costs.
- Some instantaneous gas units may not operate optimally at low flow rates or with water-efficient showerheads. These units may also struggle in warmer climates or when paired with solar preheating.
- LPG systems, while similar in functionality to natural gas systems, are typically more expensive to operate. Additionally, the need for larger gas supply pipes or multiple large gas cylinders can add to the initial installation cost.
Solar
Solar hot water systems use solar energy to heat water through solar collectors or panels. The heated water then flows into an insulated storage tank for later use. Depending on the climate, a solar hot water system can provide up to 90% of a home’s hot water. Despite initial higher costs of purchase and installation compared to conventional hot water systems, they offer savings in energy costs, reduction in greenhouse gas emissions, and availability of government rebates to offset purchase costs.
There are a variety of system options such as flat plate panels or evacuated tube collectors, open or closed circuit configurations, passive (thermosiphon) or active (pumped) systems, and gas or electric booster options.
Pros:
- Solar hot water systems are very efficient and can provide up to 90% of a home’s hot water needs depending on the climate.
- Although the upfront cost is higher, they can significantly reduce energy bills in the long run.
- Solar hot water systems use renewable energy from the sun, reducing greenhouse gas emissions.
- In Australia, the government provides small-scale technology certificates (STCs) to help offset the cost of these systems.
- There are different configurations available to suit different needs, including different collector types, system configurations, and booster options.
Cons:
- The initial cost of buying and installing a solar hot water system is higher than that of conventional hot water systems.
- The efficiency of solar hot water systems can be affected by the weather. On cloudy or rainy days, a backup booster (gas or electric) may be required.
- Can require more maintenance than conventional systems. Certain parts like the sacrificial anode in vitreous enamel tanks need regular replacement.
- Installation can be more complicated than for conventional systems and might require reinforcement of the roof to bear the weight.
Heat Pumps
A heat pump works like a refrigerator or air conditioner but in reverse. It transfers thermal energy (heat) from another source (like the air, geothermal energy from the ground, etc.) to where it is needed (like the water in your house!). Though they’re costlier upfront, they can lead to significant energy savings and reduction in greenhouse gas emissions in the long run.
Government rebates such as small-scale technology certificates (STCs) are available in Australia to help offset the costs. Heat pump systems do not require roof-mounted collectors and avoid overheating risks, as they automatically shut off when the required temperature is reached. They can be air-sourced (more common) or ground-sourced, and configurations can be either integrated or split.
Pros:
- Heat pumps use less energy than traditional hot water systems as they move heat instead of generating it, reducing energy costs and greenhouse gas emissions.
- The Australian Government provides STCs to assist with the cost of these systems.
- Unlike solar hot water systems, heat pumps don’t require roof-mounted collectors.
- The system switches off when the stored water reaches the required temperature, avoiding overheating or dumping of water in hot weather.
- If you have solar PV installed, consider timing your use to maximise the use of free renewable energy.
Cons:
- These systems are more expensive to buy than traditional hot water systems.
- Heat pumps have a fan on the outdoor unit that can produce noise, so location should be considered to avoid potential impacts on neighbours.
- The cost of running a heat pump can increase if it operates its compressor on high cost electricity tariffs, or operates an electric booster.
- Air-sourced heat pumps work best in warm, humid climates. Efficiency decreases in cold climates, but some models are designed for cold climates or come with an electric boost element to help boost water temperature.
- Heat pumps use various refrigerants, including hydrofluorocarbons (HFCs) which have high global warming potential (GWP). Although Australia is phasing down the import of high GWP HFCs, leakages can contribute to greenhouse gas emissions.
Which Hot Water System is Right for You?
Choosing the right hot water system for you depends on various factors such as your budget, your home’s size, the climate of your area, the number of occupants in your home, your hot water usage, and your energy source preferences.
Consider the following factors when deciding on a hot water system:
- Budget: If your budget is tight, you may opt for an electric or gas storage hot water system as they’re generally less expensive upfront. However, keep in mind that ongoing operational costs for some types, like electric systems, can be higher. On the other hand, while heat pumps or solar hot water systems may cost more upfront, they can provide significant energy savings over time.
- Energy efficiency: If energy efficiency and environmental impact are important to you, consider a solar hot water system or heat pump. These systems can significantly reduce your home’s carbon footprint. Gas systems, while more efficient than traditional electric, still contribute to greenhouse gas emissions.
- Space: If you’re short on space, consider a continuous flow system as they don’t require a large tank. However, be aware that continuous flow systems may require larger gas pipes or a dedicated power circuit, depending on the energy source.
- Climate: Solar hot water systems and heat pumps work best in warm, sunny climates. If you live in a colder climate, consider a gas or electric system instead.
- Hot water usage: If you have a large family or high hot water usage, a storage hot water system or a high-capacity continuous flow system might be more suitable.
- Availability of natural gas: If your home has access to natural gas, a gas hot water system could be a cost-effective option. If not, you might need to rely on electricity or consider alternatives like solar or heat pumps.
- Local regulations: Certain areas may have regulations restricting the installation of high greenhouse gas-emitting hot water systems in new buildings. It’s important to check local laws before making a decision.
- Maintenance: Different systems have varying maintenance requirements. Solar and heat pump systems may require more upkeep than traditional gas or electric systems.
Remember, choosing a hot water system is a long-term investment (find out how long a hot water system lasts). It’s worth the time to thoroughly research and consider all the options. At DCM Plumbing, we’re always ready to help you make the best decision for your home and your family. Contact us anytime for guidance and to discuss your hot water needs.
As we move into the cooler months, the reliability of our hot water systems become far more important.
If you are experiencing problems with your hot water system this article is here to answer your questions, from system life spans to signs that may indicate your system needs replacing as well as tips on prolonging the life of your unit.
Hot Water System Lifespans
How Long Do Solar Hot Water Systems Last
On average, expect up to 20 years of service with proper servicing and care. Factors such as location and maintenance can extend or reduce this time frame.
Sunlight Exposure: Areas with high levels of sunlight often see solar systems outperforming their expected lifespan, thanks to optimal operating conditions.
Maintenance: Regular servicing and upkeep are key. They ensure all parts are functioning correctly, thus prolonging the system’s life.
Quality and Installation: The longevity of your solar hot water system heavily relies on the quality of its components and the professionalism of its installation. High-grade materials and expert setup are investments in long-term performance.
Benefits:
- Eco-friendly solution
- Potential for long-term utility savings
- Consistent performance with minimal degradation
How Long Do Gas Hot Water Systems Last
Typically, gas hot water systems serve you well for about 8 to 12 years. Regular servicing can stretch this period, ensuring optimal performance.
Usage Patterns: Frequent use under high demand can shorten the lifespan due to wear and tear on components.
Maintenance: Like other systems, the key to longevity is upkeep. Regular servicing and checks can prevent common issues that might shorten its service life.
Quality Matters: Investing in a high-quality system from a reputable manufacturer can lead to a longer-lasting unit. Skimping on cost might lead to more frequent replacements.
Installation: Proper installation by a certified professional is crucial. Incorrect installation can lead to efficiency losses and increased wear.
Benefits:
- Rapid heating and recovery times
- Cost-effective operation in areas with access to natural gas
- Compatibility with a range of property sizes and layouts
How Long Do Electric Hot Water Systems Last
On average, you can expect an electric hot water system to last between 10 to 15 years. The variance in lifespan is often attributed to the system’s design and the environment in which it’s installed.
Maintenance: Maintenance, again, plays a significant role in extending the life of electric hot water systems. Annual inspections can identify potential issues before they become significant.
Water Quality: The type of water running through the system can impact its durability. Hard water, high in minerals, can lead to sediment build-up, which may shorten the system’s life.
System Quality: Investing in a high-quality electric hot water system from a strong brand often means a longer lifespan due to superior materials and construction.
Usage: High demand and frequent usage patterns can accelerate wear on the system, potentially reducing its lifespan.
Benefits:
- Predictable heating times and consistent water temperature
- Generally lower initial purchase and installation costs compared to gas or solar systems
- No need for gas lines, making them ideal for locations without natural gas service
How Long Do Heat Pump Hot Water Systems Last
Typically, heat pump hot water systems offer a lifespan of around 10 to 15 years. Advances in technology and design are constantly pushing these boundaries further.
Maintenance: Regular maintenance is less about preventing immediate breakdowns and more about ensuring efficiency. Annual checks can help maintain optimal performance.
Installation Location: The system’s environment plays a crucial role. Systems installed in areas with stable, moderate climates tend to last longer than those in extreme conditions.
Usage Patterns: As with all hot water systems, the amount of use will impact its longevity. However, heat pumps are generally well-equipped to handle high demand.
Water Quality: Good water quality is beneficial for any hot water system, including heat pumps. Hard water may necessitate more frequent maintenance to mitigate scale buildup.
Benefits
- Reduced Energy Consumption
- Operational Savings:
- Eco-Friendly
How to Know if Your Hot Water System Needs Replaced
To prevent unexpected failures, it’s important to know when your hot water system might need replacement.
Inconsistent Water Temperatures: If your water doesn’t stay warm or heats irregularly, the system might be failing.
Visible Leaks: Any water pooling or dampness around the system often indicates leakage, possibly due to corrosion.
Increased Energy Bills: A sudden spike in your bills can mean your system is losing efficiency and costing more to operate.
System Age: If your system is nearing or has exceeded its expected lifespan, consider having it assessed by a professional.
Unusual Noises: Knocking, banging, or rumbling sounds from your system can indicate sediment buildup, which not only affects efficiency but can also cause damage to the tank.
Rusty Water: If the hot water from your taps is discoloured or has a rusty hue, it could be a sign that the internal tank is corroding. Frequent Repairs: If you find yourself repeatedly calling for repairs, it might be more cost-effective to invest in a new system.
Hot Water System Solutions with DCM Plumbing
Whether you’re facing decisions about repairs, replacements, maintenance, new installations or what type of hot water system is right for you, having a professional team by your side is invaluable.
DCM Plumbing offers expertise in all things related to hot water systems. Our specialists are on hand to guide you through repairs, advise on replacement, offer thorough servicing, or manage the installation of a new system, ensuring your home benefits from optimal warmth and efficiency.
Our 35 years of experience and our reputation as the best plumber on the Gold Coast will keep your hot showers running, especially during those colder months. Let us help you ensure that your hot water system serves you well for years to come.
In this article, we run through 5 reasons that might cause your hot water to run out faster than usual.
We’ve all been there, tired after a long day of work, barely managing to drag ourselves to the shower. We turn on the tap, get undressed, and then stick a hand under the stream to check the water temperature. Odd, it’s tepid – so we crank the hot water tap to the max and hop in, hoping for the best.
It gets warmer, and you start to feel the tension of the day leave your shoulders. Then, just as you let your guard down, the water turns from lovely and warm to freezing in a second, and no amount of twisting the hot tap does anything! And the worst thing is, you also forgot to leave a towel out before getting in…
Hot water running out faster than it should is never convenient, whether you’re doing the dishes, hopping in the shower, or wanting to do some laundry. That being said, the cause of your hot water not lasting as long as usual can be a bit tricky to pin down. That’s why we’ve collected 5 reasons your hot water doesn’t last long to help you identify and fix your hot water troubles.
DCM Plumbing is the best plumber on the Gold Coast. We are available 24/7 for all your plumbing needs. With over 900 5* Google reviews and 35 years of experience, we are known as the best for a reason. Got a blocked drain? Need help with leak detection? Want to learn how to clear a blocked drain? We can help.
5 reasons your hot water doesn't last long
Old water heater
The first thing to consider when your hot water starts running out faster than usual is how old your water heater is. As water heaters age, they become less efficient and have to work harder to heat up water – which means they use more energy, and ultimately, they don’t heat water as hot or for as long as they used to. So if your water heater is getting on in years, it might be time for a hot water system replacement. Alternatively, be sure to get regular hot water system services to extend your water heater’s life!
Signs of an old water heater:
- The water heater is more than 10 years old
- There is corrosion in the tank
- Discoloured hot water
- Expensive energy bill
Faulty heating element
A faulty heating element is another common cause of your hot water not lasting as long as it used to.
To fix a heating element, you’ll need a professional hot water system repair or hot water system replacement.
Signs of a faulty heating element include:
- Water is not getting as hot as it used to
- Hot water causing the circuit breaker to trip
- Hot water not lasting as long as it used to
Sediment build-up
One of the most common causes of hot water running out faster than it used to is sediment build-up. Over time, bits of minerals and rust can build up inside your water heater, which can then clog it and cause all sorts of issues.
The good news is that this is an easy problem to fix with a hot water system service or hot water system repair. You’ll just need to flush out your water heater to eliminate the sediment build-up. However, if the sediment build-up is particularly bad, you may need a complete hot water system replacement.
Signs of sediment build-up include:
- Hot water heater makes strange noises
- Fluctuating temperatures
- The water from your taps looks rusty
- Higher than usual energy bill
- Leaks near the water drain valve
- Water takes a long time to heat up
Faulty Tempering Valves
A tempering valve is a three-way valve in your water heater that mixes very hot water from the heater itself with cold water from the water supply and then sends the hot (but not too hot) water to the taps in your home. They maintain a steady and safe water temperature for households, usually around the 50C mark.
A faulty tempering valve is a common cause of a household’s hot water not lasting as long as it used to, as it may mix the incorrect amounts of hot and cold water. This also means a faulty valve could cause scaldingly high water temperatures and so should be fixed immediately to avoid serious injury.
The reason for the use of tempering valves is that water in the hot water system must be over 60C to kill bacteria, while the water in your taps can’t be over 50C due to scalding. This is detailed in the Queensland Government’s requirements for installing temperature control devices, which falls under the Plumbing and Drainage Act 2018.
Signs of a faulty tempering valve:
- Fluctuating water temperatures
- Cold water
- Low water pressure (tempering valves are also susceptible to sediment and can get clogged)
- Hot tap dripping when not in use
Leaks
Another common reason for hot water not lasting as long as it used to is leaks. If there’s a leak in your hot water system, the water will drain out faster than it can be refilled, causing you to run out of hot water sooner than usual. Leaks can also lead to higher than normal water and electricity bills.
Signs of a leak in your hot water system include:
- Water pooling around your water heater
- A decrease in water pressure
- Strange noises coming from your taps or pipes
- Your energy and/or water bill is higher than usual
Remember that regularly servicing your hot water system will help extend its functional life and avoid any unforeseen problems. To find out more, read our blog on ‘Do hot water systems need servicing?‘
If your hot water is running out too quickly, contact DCM Plumbing today
At DCM Plumbing we have years of experience in fixing hot water that is running out too quickly, through hot water system services, hot water system repairs, and hot water system replacements, as well as a variety of other plumbing services. We’ll quickly diagnose the problem and find the best solution for you, ensuring your hot water is running for as long as it should. Contact us today!
DCM Plumbing are family run team of professional plumbers. Our team is dedicated to supplying a professional plumbing and drainage service throughout the Gold Coast. We have been servicing residential and commercial properties since 2002 within Burleigh Heads and throughout the Gold Coast region.
- About Us
- Why Choose Us
- Meet Our Team
- Locations
- FAQ’s
- Who We Work With
- Residential
- Commercial
- Real Estates / Body Corporates / Strata Managers
- Builders

Google Rating
5.0
Based on 1175 reviews
DCM Plumbing & Drainage Pty Ltd
5.0

Tim McCarthy
1713832968
Jackson and Laura arrived on time and did the required work in a professional manner.Plus answered any question when asked.Great work all round.


Louise Moran
1713328262
Prompt and reliable service. The plumber explained everything well and had a lovely manner. Will definitely use them again.

Richelle Williams
1713262695
Great service and communication. Turned up on time, even took their shoes off at the door! Thank you


Jordana Downes
1713241011
Friendly and quick service. Christian explained everything thoroughly. Highly recommend there services. Mark


Gail Casey
1712814258
Thank you to DCM plumbing and big thank you to Angus. He was such a pleasure to deal with and explained all the things we wanted to know and what he recommended we are very happy with. He worked tirelessly until the work was completed. We highly recommend his high standard of work.


Chloe noll
1712710502
Highly recommend DCM Plumbing & Drainage.Prompt service and great communication. Efficient diagnostics! Ask for Christian.

Jacqueline Taylor
1712708309
Huge thanks to Jackson for his hard work and great service installing a new hot water system, fixing taps and drains at my house yesterday. He was polite, efficient and knowledgable. Highly recommend this company and will request Jackson for future jobs if needed.

Thomas Chorles
1712532796
Jackson arrived promptly and was very polite . He quoted for each job before approaching. He worked efficiently and I was very happy with his work . A good experience overall .


Brittany Keenan
1711769985
The whole DCM team provided expert and professional service, while being incredibly friendly and flexible, particularly Jackson. We were so happy with their services and will definitely use DCM again when needed!

david lawley
1711487532
Pete the plumbing tradesman was outstanding, very helpful and professional, knew exactly what to do. Checked everything in the house and rectified the leak in the bathroom vanity.A1 service. Great person.

trevor cooke
1711437355
Great service, especially working and completing the job in the rain. Very happy with the service provided by Jackson and Meredith (in the office).


Gwenda O'Grady
1710911067
Hi it's Gwenda. Was very happy with the Young man who did a great job. Have already forgotten.With my age. 81. His name. My memory is getting worse. Was it Jackson. ?1 will read your note againAnd will write what you saidAnd then get in touch..with Gold Coast Council. Re the water .Am a worried re the expense.My son is going away for a month soon.Will have to get in touch with himFor his help.Was very happy l got your business. Thank you.

Samuel Barker
1710895578
Excellent service. We had what appeared to be a blocked sink drain but turned out to be a bigger problem, the team were very professional in diagnosing the problem. Excellent communication at every stage of the process, beginning with the office organising the appointment, through to the crew advising us they were running a bit late. Good transparent explanation of pricing, and the team went out of their way to give different pricing options and find cheaper ways of doing the job. Absolutely recommend DCM plumbing and drainage.


Gail
1710240776
Very happy with every aspect of DCM Plumbing. Communication, service and all staff contact was an absolute joy. I have worked in Building Industry on Gold Coast for 23 plus years and have seen a lot in my time. I cannot fault DCM Plumbing in anyway. Thank you Jackson for all you did for me today.

Lizzie Marsh
1710222468
Awesome service for a tricky job. Well done guys! Prompt, excellent communication.

Di Dawbin
1710124637
Excellent service. We were advised by email and txt message of whom would be attending with a picture of representative for id. He then advised of an earlier than scheduled arrival time andwas very professional. Would recommend firm to those in need of copper water pipe leakage fixes. Will definitely reuse in future if required.

Jack O'Rourke
1709864756
Great guys, knowledgeable and experienced, prompt efficient reliable.Cleaned up and kept us in the loop during the work. Will no doubt call you again next time! Thanks so much, great family business you can trust not to rip you off! :)

Rachel Hill
1709796361
Great prompt same day service, Pete provided friendly efficient service and found our issue and fixed quickly. Highly recommend. Thanks

Campbell.
1709598663
A big thank you to the two young gentlemen that came over today. Excellent service & workmanship Prices are a tad higher than expected!


Underpicker
1709186430
Very Happy with Sam and his Team for the Plumbing & Drainage work they did recently at our residenceThey carried out the work in an extremely efficient & professional manner, communicating with us throughout the whole process.(Their price for our job was very competitive as well)Would highly recommend DCM Plumbing to anybody wanting expert trades people who will do the job properly and are a pleasure to deal with

Coralie Blake
1709085063
Great service by Jackson and Laura, cleaned a blockage.Very respectful and pleasant guys.Thank you

Ben Morris
1709075240
Jackson and Lauren were open and transparent about cost and scope of works completed at my house, They got the job completed with ease. I would truly recommend them for future works.


Michelle Zhang
1708649237
Very professional company. Quick quote, very friendly office person, sent reminder message before the appointment day with plumber's name, photo, date etc. The plumber Peter is a very friendly and good guy, checked all taps inside my room without extra charge and fixed my shower head perfectly. Price is reasonable and changed two nice taps and didn't make any messy on the floor. I have recommended my neighbour to use their plumbing service.


Ann Archer
1707275027
Plumber was punctual, skilled and knowledgeable. I was very happy with the service.

Jaggs Journeys
1706853332
I was very impressed with their level of service. Their communication was also excellent and Pete was very professional and friendly and had the issues all sorted and fixed in a very short amount of time! I would definitely use DCM again and would also recommend them 👌Regards,....Shane

Harnoor Kaur
1706843443
DCM Plumbing & Drainage provided exceptional service. The communication throught the process was impressive. The team's expertise was evident in the quality of work. They addressed the plumbing issue efficiently, leaving me satisfied with the result. I highly recommend them 👍👍

Graham Leo
1706160394
I phoned for an emergency plumber at 10.30pm. Meredith answered and was brilliant in organising service. Jackson and Keane came next day to repair a leak in the ceiling space. Did a great job. Efficient, good-humoured, and polite. They cleaned up behind themselves and were really professional. Meredith rang us to say they’d be running a bit late and kept us well informed. We couldn’t be happier with the service. Thanks everyone.

Kris Mant
1705564464
I would highly recommend DCM plumbing they are the most reliable and trustworthy company and I wouldn’t use anyone else, I had a water leak and they worked hard in the rain and got it fixed with no problem at all they go over and above to get the job done.

Carmel Sporne
1705549525
Christian did an excellent job in unblocking our drain. He was on time, professional, very friendly and has great customer skills. I would be happy to use DCM Plumbing and Drainage again and will be recommending them to family and friends.

©DCM Plumbing & Drainage 2024 All Rights Reserved
Terms and PrivacyGold Coast SEO & Design by Five by Five


