Want to make an appointment with one of our expert plumbers? Get in touch!
Noisy water pipes can be a common yet troublesome issue in many households. Whether it’s a sudden bang, a persistent rattle, or an irritating hum, these noises can disrupt the peace and indicate underlying problems in your plumbing system. Such disturbances are not just annoying; they can also signal potential damage that might lead to more serious plumbing issues if left unchecked. This blog will provide you with comprehensive solutions and practical tips to identify, diagnose, and fix noisy water pipes
Common Causes of Noisy Water Pipes
Water Hammer
Water hammer is one of the most common culprits behind noisy water pipes. It occurs when a fast-moving stream of water is suddenly halted by a closing valve, creating a shock wave that reverberates through the plumbing system. This sudden stopping of water flow can produce a loud banging noise, often startling homeowners.
Water hammer typically happens in situations where high water pressure is present or when a valve is quickly turned off, such as when a washing machine or dishwasher completes its cycle. The force of the water colliding with the closed valve can be strong enough to damage pipes, joints, and fixtures over time.
Example: You might notice a loud banging noise right after suddenly shutting off the kitchen tap or when your washing machine stops filling with water. This indicates the presence of water hammer.
If left untreated, water hammer can lead to significant issues, including:
- Pipe damage or rupture
- Loosened joints and fittings
- Damage to valves and fixtures
- Increased wear and tear on the plumbing system
Solution: There are different ways you can stop water hammer. Installing water hammer arrestors or air chambers can absorb the shock wave and mitigate the noise. Additionally, ensuring your water pressure is within the recommended range can help reduce the occurrence of water hammer.
Loose Pipes
Loose pipes are another frequent cause of noisy water pipes. When pipes are not securely fastened, they can move and rattle against walls, floors, or other objects whenever water flows through them. This movement can create various noises, including banging, clanking, or rattling sounds, especially when taps are turned on or off, or when appliances like dishwashers and washing machines are in use.
Common scenarios where pipes might become loose:
- Ageing or Worn-Out Fasteners: Over time, the brackets, clamps, or straps that hold pipes in place can wear out or loosen, causing pipes to shift and vibrate.
- Renovations or Construction Work: Any recent remodelling, construction, or even minor home repairs can inadvertently loosen pipes or their supports, leading to noise issues.
- Thermal Expansion and Contraction: Changes in temperature cause pipes to expand and contract. This can gradually loosen fasteners, particularly in older homes where the original installations might not accommodate such movements effectively.
- Water Flow Dynamics: Sudden changes in water flow or pressure, like those from quickly turning off a valve, can jolt pipes and loosen their mounts over time.
Solution: Addressing loose pipes involves locating the sections where movement occurs and securing them with appropriate fasteners. Adding cushioning materials, such as foam or rubber padding, can also help dampen the noise.
High Water Pressure
High water pressure can have a significant impact on your plumbing system and is a common cause of noisy water pipes. When the pressure in your water system is too high, it creates excessive force within the pipes. This heightened force can cause pipes to vibrate, leading to various noise issues.
Impact of High Water Pressure on Plumbing Systems:
- Wear and Tear: High water pressure accelerates wear and tear on your plumbing fixtures and appliances. This can lead to leaks, bursts, and a shortened lifespan of your plumbing infrastructure.
- Increased Stress: The excessive force exerted by high water pressure puts undue stress on pipes and joints. This stress can result in frequent repairs and maintenance issues.
- Water Waste: High water pressure can cause more water to be used than necessary, leading to higher water bills and increased water waste.
Solution: To address high water pressure, a pressure-reducing valve (PRV) can be installed in your plumbing system. This valve helps regulate the water pressure to a safe and consistent level, reducing the likelihood of noisy pipes and prolonging the life of your plumbing fixtures and appliances. Regularly checking and adjusting water pressure can also help prevent issues related to high pressure.
Faulty Fixtures
Faulty fixtures are another common cause of noisy water pipes. Over time, wear and tear or improper installation can lead to issues in various fixtures that result in unsettling sounds throughout your plumbing system. Understanding which fixtures are prone to problems and the types of noises they produce can help you diagnose and fix the issue more effectively.
Common Fixtures That Can Cause Noise:
- Taps: Worn-out washers or loose parts inside taps can cause a whistling or screeching noise when the tap is turned on or off. If the internal components are not secure, they can vibrate as water flows through them, producing high-pitched sounds.
- Toilets: A faulty fill valve can lead to continuous running water or a hissing sound. These noises are often due to water escaping from the tank into the bowl, causing the fill valve to constantly activate to maintain the water level.
- Showerheads: Mineral deposits or debris buildup in showerheads can restrict water flow, causing a sputtering or hissing noise. Additionally, loose components inside the showerhead can rattle or produce a buzzing sound.
- Water Heaters: Sediment buildup at the bottom of a water heater can cause popping or rumbling noises as the sediment is heated and shifts around. Faulty heating elements, loose parts or faulty pressure valves can also contribute to noise.
Solution: To address noises caused by faulty fixtures, regularly inspect and maintain your plumbing fixtures. Replacing worn-out washers, cleaning showerheads, or repairing toilet components can often resolve these issues and restore quiet operation to your plumbing system. If the problem persists, consulting a professional plumber may be necessary to ensure a thorough and effective fix.
When to Call a Professional Plumber
While some noisy water pipe issues can be addressed with DIY solutions, there are certain situations where professional help is essential to ensure the problem is resolved effectively and safely.
- Persistent Noise Issues: If you’ve tried various DIY fixes and still hear banging, rattling, or other noises from your pipes, it may be time to call in a professional plumber. Persistent noise issues can indicate underlying problems that require expert diagnosis and repair.
- Visible Pipe Damage: If you notice any visible damage to your pipes, such as cracks, corrosion, or significant wear and tear, it’s crucial to get a professional assessment. Damaged pipes can lead to serious leaks and water damage if not addressed promptly.
- Water Hammer Problems: Water hammer can cause substantial stress on your plumbing system, leading to potential pipe bursts and damage. A professional plumber can install water hammer arrestors or air chambers to mitigate the issue effectively.
- High Water Pressure: If you suspect that high water pressure is causing noise and potential damage to your pipes, a plumber can install a pressure-reducing valve (PRV) to regulate the pressure within safe limits.
- Complex Fixture Issues: Some fixtures, like water heaters or advanced plumbing systems, can have complex issues that require professional expertise. If your water heater is making unusual noises or if you encounter problems with intricate fixtures, a plumber can provide the necessary repairs or replacements.
Needing professional help for your noisy water pipe?
If you’re dealing with noisy water pipes or any other plumbing issues, trust the experts at DCM Plumbing to provide reliable and efficient solutions. Our experienced team is ready to help you restore peace and functionality to your home. Contact DCM Plumbing today to schedule a professional assessment and get your plumbing system back in top shape. Call us now or visit our website to book an appointment.
Outdoor showers encapsulate the ultimate Australian lifestyle, combining functionality with an open-air charm. Particularly in Queensland, with the appeal of rinsing off under the sun after a beach day or a dip in the pool. However, installing an outdoor shower involves more than just aesthetic consideration, it requires thoughtful planning that adheres to local regulations, especially when it comes to plumbing and drainage.
Considerations for Installing an Outdoor Shower
- Location: Choose a spot that offers privacy and is close to water sources. Ensure it is convenient for use but does not affect the aesthetics of your garden.
- Water Supply: We recommend using cold water only to avoid complications associated with drainage and soap use. Hot water requires additional plumbing and compliance with drainage regulations.
- Drainage: Ensure the proper drainage is possible to prevent water pooling and property damage. It’s crucial to comply with your local plumbing and drainage regulations.
- Installation: We recommend engaging a professional to help with installation to ensure safety, compliance with local codes, and optimal functionality.
Understanding Local Regulations
Drainage Compliance
Regulations in Queensland require that all greywater, including water from outdoor showers, is disposed of properly. This often means directing water to a designated garden area or an approved drainage system. Using cold water only simplifies compliance, as it avoids the need for extensive drainage solutions required for soapy water.
What is greywater?
It is the wastewater from baths, sinks and washing machines etc. It does not include sewage or blackwater, which comes from toilets. Greywater can be reused for irrigation and other non-potable uses, making it an eco-friendly option for water conservation.
Water Supply
Queensland laws mandate that any outdoor plumbing work must be performed by a licensed plumber. This ensures that the water supply is safely and correctly installed.
Privacy Considerations
Local regulations might also include guidelines on privacy, ensuring that your outdoor shower does not infringe on the privacy of your neighbours.
Environmental Impact
Consider the environmental impact of your outdoor shower. Queensland regulations may include measures to minimise water waste and protect the local ecosystem.
Consulting a Professional
It’s always a good idea to consult with a professional local plumber such as DCM plumbing, who is familiar with local regulations to ensure your outdoor shower installation is compliant. This will save you potential fines and ensure your setup is safe and functional. For more details on specific regulations, visit your local council’s website or contact a licensed plumber for advice.
Design Considerations
- Materials: Use durable, weather-resistant materials like stainless steel, brass, or treated wood to withstand the elements.
- Flooring: Opt for non-slip materials for the shower floor to prevent accidents. Stone, concrete, or wooden slats are popular choices. Ensure the flooring allows for adequate drainage.
- Enclosure: Depending on your privacy needs, you may want to include an enclosure. Options range from simple screens to structures using wood, bamboo, or metal.
- Storage: Incorporate storage solutions like shelves or hooks for towels, soaps, and other essentials.
- Lighting: If you plan to use the shower in the evening, consider adding outdoor lighting.
- Accessibility: Ensure the shower design is accessible for all users. Consider installing a handrail or a bench for added safety and comfort.
Basic Outdoor Shower Installation Guide
- Water Supply
- Cold Water Only: For simplicity and cost-effectiveness, connect your outdoor shower to a cold water line. This avoids complications with hot water systems and the associated drainage requirements.
- Water Line Installation: If you don’t have an existing water line near your chosen location, you’ll need to run a new line from your home’s main supply. It’s best to hire a professional plumber to ensure proper installation.
- Drainage
- Proper Drainage System: Install a drainage system to handle wastewater. In Queensland, you must comply with local council regulations. Greywater should be directed to a suitable drainage area or connected to an existing waste system.
- Tip: For a simpler setup, ensure the shower drains onto a gravel bed or a garden area where the water can percolate into the ground, provided no soap or chemicals are used.
- Surface Preparation
- Foundation: Prepare a solid, level foundation for your shower. Ensuring the area around the shower is waterproof to prevent water damage to your home or garden structures.
- Plumbing Fixtures
- Choosing Fixtures: Select outdoor-rated plumbing fixtures resistant to rust and corrosion. Stainless steel and brass are excellent choices for durability.
- Installation: Mount the fixtures securely, ensuring they are at a comfortable height for users. Professional installation is recommended to ensure all connections are watertight.
- Testing
- Leak & Drainage Checks: Once installed, test the shower for leaks by running the water and checking all connections. Ensure the drainage system works efficiently by observing how quickly and effectively water is removed from the shower area.
Plumbing and Drainage Considerations
Opting for a cold water outdoor shower simplifies the installation process significantly. Without the need for hot water, you avoid the complexities and regulatory hurdles associated with soap and greywater management. This means no need for extensive plumbing work or compliance with strict drainage regulations.
Proper drainage is essential to prevent soil erosion and water contamination. Ensure your outdoor shower has an efficient drainage system that channels water away from your home and garden. This helps avoid water pooling and potential damage to your property. Consulting a professional plumber like DCM Plumbing can ensure your setup meets all local requirements and functions smoothly.
Maintenance and Upkeep
- Regular Cleaning: Clean the shower head, fixtures, and surfaces regularly to prevent the buildup of dirt, algae, and mildew.
- Check for Leaks: Periodically inspect the plumbing for any leaks or signs of wear.
- Protective Covers: If your outdoor shower has fixtures that are susceptible to weather damage, consider using protective covers when the shower is not in use.
- Winter Care: In colder months, especially if temperatures drop significantly, it’s crucial to winterise your outdoor shower. This includes draining the pipes and turning off the water supply to prevent freezing and bursting.
- Material Maintenance: Depending on the materials used, you may need to apply sealants or protective coatings.
- Debris Removal: Keep the area around the shower free of leaves, dirt, and other debris that could clog the drainage system or cause water to pool.
Maintaining a clean shower head not only ensures a strong, steady water flow but safeguards your health. Over time, shower heads can accumulate mineral deposits, limescale, and even bacteria, which can significantly affect their functionality and potentially harm your well-being. Regular cleaning enhances the performance of your shower head and extends its lifespan.
Recognising Signs of a Clogged Shower Head
Reduced Water Pressure
If you notice that the water stream is weaker than usual, it could be due to mineral deposits narrowing the passages inside the shower head.
Uneven Spraying
Water should flow evenly from all nozzles. If some areas spray water erratically or not at all, it’s likely they are blocked.
Water Spraying in Odd Directions
When nozzles are clogged, water may be forced out in directions it’s not meant to go.
Visible Mineral Deposits
Look for white, green, or brown buildup around the nozzles. This is a clear sign of mineral deposits from hard water.
At Home Shower Head Cleaning Solutions
Supplies
- White vinegar
- Baking soda (optional for tougher grime)
- A plastic bag large enough to cover the shower head (with no holes!)
- A rubber band or a twist tie
- An old toothbrush or a small brush
- A soft cloth
Prep
- Run hot water through the shower head for a minute to flush out any loose sediment.
- Ensure the shower is off. It’s advisable to also turn off the water supply if you plan to remove the shower head for a deep clean.
- If accessible, unscrew the shower head from the hose or pipe. This step is optional but recommended for a more comprehensive clean.
- Check the shower head for any signs of wear or damage.
Vinegar Soak Method
- Remove the Shower Head (optional):
- If possible, remove the shower head by unscrewing it from the hose or fixture. This step is optional but can make for a more thorough cleaning process.
- Vinegar Soak
- Fill the plastic bag with white vinegar.
- Submerge the shower head in the vinegar-filled bag. If you’ve removed the shower head, you can directly place it in a bowl filled with vinegar.
- Secure the bag around the fixture with a rubber band or twist tie.
- Let it soak for at least 30 minutes. For heavy build-up, a few hours or overnight might be necessary.
- Scrub the Nozzles
- After soaking, remove the shower head from the vinegar.
- Gently scrub the nozzles with a soft brush or toothbrush to dislodge any remaining deposits.
- Rinse and Reattach
- Rinse the shower head thoroughly under warm water.
- If you removed the shower head, reattach it to the hose or fixture.
- Run hot water through the shower head for a few minutes to flush out any loosened deposits.
- Dry and Polish
- Use a soft cloth to dry and polish the shower head, restoring its shine and helping prevent water spots.
Baking Soda Method (for more Stubborn Deposits)
- Mix a Cleaning Solution:
- Combine equal parts of baking soda and white vinegar to form a paste. The mixture will fizz initially, which is normal and part of the chemical reaction that helps lift stubborn deposits.
- Apply the Paste:
- Use a sponge or an old toothbrush to apply the paste directly onto the areas of the shower head with noticeable buildup. Make sure the nozzles are well coated to address any clogs inside them.
- Let It Sit:
- Allow the paste to sit on the shower head for about 10 to 15 minutes. This duration lets the baking soda and vinegar work together to break down the mineral deposits.
- Scrub:
- After the paste has set, scrub the shower head with a brush. Focus on areas with significant buildup and gently work the bristles into the nozzles to ensure they are clear.
- Rinse Thoroughly:
- Remove all residue by rinsing the shower head under warm, running water. Ensure that all traces of baking soda and vinegar are washed away.
- Reattach and Test:
- If you removed the shower head, screw it back onto the hose or fixture.
- Run the shower for a few minutes to ensure that the water flow is even and the nozzles are clear.
Advanced Tips for Tough Buildups
CLR Cleaner
CLR (Calcium, Lime, and Rust remover) is more potent than vinegar and can dissolve heavy buildups effectively. Apply it according to the manufacturer’s instructions, taking care not to damage your shower head’s finish.
Dental Picks
These tools are excellent for scraping off mineral deposits from tiny nozzles. They allow precision without scratching the surface.
Soak Longer
If deposits are thick, consider extending the vinegar or CLR soaking time. Overnight soaks can significantly enhance cleaning results.
Increase Water Pressure
Sometimes running water at the highest pressure for a few minutes can dislodge lingering debris post-cleaning.
Professional Cleaning Solutions
For extremely resistant buildup, commercial-grade cleaners designed for plumbing fixtures can offer a solution. Ensure they are safe for use on your specific shower head material to avoid damage.
Maintenance Tips to Prevent Future Buildup
- Regular Cleaning: Implement a monthly cleaning routine with vinegar to prevent mineral deposits from hardening.
- Install a Water Softener: If you live in a hard water area, consider installing a water softener to reduce limescale buildup in your plumbing fixtures.
- Wipe Down After Use: After each shower, take a moment to wipe down the shower head with a dry towel. This simple step can help prevent mineral deposits from forming.
- Use Filtered Water: Consider installing a filter on your shower system to reduce the minerals and impurities that cause buildup.
Plumbing Solutions with DCM
If you’re encountering stubborn build ups or need professional help with your plumbing, DCM Plumbing is here to assist. Our experienced team can help with all your plumbing needs on the Gold Coast, ensuring your showers are always in top condition. Don’t let a clogged shower head dampen your day—contact DCM Plumbing for expert assistance.
Traditionally, a plumber’s snake, also known as a drain auger, has been the go-to tool for tackling stubborn blockages. This flexible, coiled tool is designed to manoeuvre through complex piping to dislodge debris and restore flow.
However, while it’s been a staple in plumbing toolkits for decades, newer technologies offer more effective solutions. We take a look at how to use a plumber’s snake, understand its limitations, and discuss why high-pressure water jetting has become the preferred method for modern plumbers.
What is a Plumber's Snake?
A plumber’s snake is a tool used primarily to clear blockages deep within your plumbing system. Unlike a standard plunger that works on superficial clogs, a plumber’s snake reaches far down into the drain.
This tool consists of a long, flexible metal cable with a coiled spiral or blade at one end and a handle on the other. The handle helps you feed the cable into the pipe and rotate it, allowing the coil to hook onto debris or cut through the clog.
Plumber’s snakes come in various sizes, from handheld models suitable for minor kitchen or bathroom sink clogs to larger, motorised versions used for main sewer lines. Despite their utility, the mechanical nature of these tools means they can be somewhat harsh on pipes and often require significant physical effort to operate effectively.
How to Use a Plumber’s Snake
Step 1. Clear out under the sink or the surrounding area to give yourself ample room to work. It’s a good idea to have a bucket or rags handy to catch any spillage.
Step 2. Begin by feeding the coiled end of the snake into the drain. Keep feeding the cable until you feel resistance, this indicates you’ve reached the clog.
Step 3. Once the coil is engaged with the clog, slowly turn the handle. This rotation helps the coil to either grab the debris or break it apart. Continue to push and rotate the snake deeper into the clog as needed.
Step 4. Once you feel the blockage clear, slowly pull the snake out of the drain. Be prepared for debris or water that may follow.
Step 5. Remove any debris caught on the snake and clean the tool thoroughly. Flush the drain with hot water to clear any remaining residue.
For a deeper understanding of what might be clogging your pipes, check out our blog on the main causes of blocked drains.
Risks Associated with Using a Plumber's Snake
While a plumber’s snake can be an effective DIY method for minor clogs, its use is not without risks, especially for those unfamiliar with plumbing tools.
Pipe Damage: Improper use of a snake can lead to scratches, cracks, or even breaks in the pipes, particularly if they are older or made from less durable materials.
Complex Blockages: A snake might clear part of a blockage but push the rest further into the plumbing, complicating the problem. It might also compact the blockage, making it harder to remove later.
Ineffectiveness on Tough Clogs: For dense blockages caused by roots or hardened debris, a plumber’s snake might not be strong enough to clear the pipe effectively.
Safety Concerns: Using a mechanical snake involves physical effort and handling, which can lead to injuries if not done correctly. This is especially true for motorised snakes, which can twist or jerk unexpectedly.
The Shift to High-Pressure Water Jetters
The plumbing industry has seen significant advancements, with high-pressure water jetters becoming the preferred method for clearing tough clogs and maintaining pipes.
Efficiency: Water jets can clear a variety of obstructions quickly, from mineral buildup to tree roots, without damaging the pipes.
Precision: Unlike mechanical snakes, water jets can reach deep into the plumbing system with precision, ensuring that the entire blockage is eradicated.
Safety: Water jetters pose fewer risks to the pipes and the user. There’s no physical tooling that might break or cause injury.
Long-term Solution: Regular use of water jetting as part of maintenance can prevent the accumulation of blockages, reducing emergency calls and prolonging the life of the plumbing system.
High-pressure water jetting is a testament to modern plumbing solutions that not only solve immediate problems but also contribute to the longevity and efficiency of plumbing infrastructures. At DCM Plumbing, embracing these technologies ensures that our clients receive the most effective and safe plumbing solutions available.
Why Professional Help Is Recommended
While plumber’s snakes can sometimes offer a quick fix, their effectiveness and safety are not always guaranteed. If you’re facing stubborn clogs or recurrent drainage issues, it’s important to consider professional help.
- High-pressure water jetters are significantly more effective at clearing out all types of blockages and cleaning the entire pipe rather than just punching a hole through the blockage as a snake might.
- Unlike manual snaking, which often provides a temporary fix, jetting can remove the buildup that causes frequent clogs, reducing the likelihood of future problems.
- Regularly scheduled jetting can help prevent blockages before they start, keeping your plumbing in optimal condition without the emergency situations that necessitate urgent fixes.
For those on the Gold Coast, choosing DCM Plumbing means opting for a solution that not only clears blockages but also preserves the integrity and longevity of your plumbing systems. Trust the experts to handle your plumbing needs with the most effective tools and techniques available today.
Ready to get your drains cleared without the hassle? Contact us at DCM Plumbing today for expert assistance and see why we are the trusted choice for plumbing solutions on the Gold Coast.
Water damage resulting from plumbing issues can wreak havoc on Australian homes. Burst pipes, leaky appliances, and blocked drains pose risks. Homeowners often left wondering if insurance policies protect against such incidents. We explore common plumbing problems and clarify what home insurance typically covers.
Understanding Home Insurance Coverage for Plumbing
Home insurance typically provides coverage for sudden and accidental damage. This means that if a pipe bursts unexpectedly and floods your kitchen, your policy is likely to cover repairs and associated damages. However, it’s crucial to always read the fine print. Most insurers distinguish between sudden accidents and gradual damage.
Gradual damages, such as slow leaks or corrosion that have developed over time, are often excluded from standard policies. This distinction is based on the expectation that homeowners will maintain their plumbing systems regularly. Insurers consider gradual damage preventable with proper care and routine inspections.
Types of Plumbing Problems Covered
While coverage details vary between policies, many Australian home insurance providers offer protection against certain plumbing issues:
Burst Pipes
If a pipe suddenly ruptures or bursts due to age, freezing, or other unexpected causes, any resulting water damage is usually covered. This includes pipes within walls, floors, or underground lines.
Appliance Leaks
Water damage from leaks originating from household appliances like washing machines, dishwashers, refrigerators etc. is commonly included in policies. Proper maintenance records may be required.
Roof Leaks
Most insurers cover interior water damage if roof leaks occur after storms, high winds, hail or other accidental events. Gradual leaks from old/worn roofing are typically excluded.
Blocked Drains/Sewage Backups
Several providers offer optional sewage backup coverage to protect against water damage from overflowing drains or sewage lines. Check if this is included in your plan.
Plumbing Problems Not Covered by Home Insurance
While home insurance can provide coverage for many plumbing issues, certain types of damage are generally excluded from standard policies:
Gradual Leaks and Water Damage
Insurers do not cover damage resulting from gradual leaks, seepage or water intrusion over an extended period.
This includes:
- Slow leaks from pipes, fixtures or appliances over time
- Water damage from unaddressed leaks or lack of maintenance
- Deterioration or rot caused by neglected moisture problems
Policies view these as preventable issues that homeowners should address through regular maintenance and timely repairs.
Wear and Tear
Any plumbing problems arising from normal wear and tear, such as corroded or rusted pipes, are typically excluded. Insurers expect homeowners to replace ageing plumbing components as needed.
Sewer Backups/Drain Clogs
Standard home insurance usually does not cover sewer backups, drain blockages or resulting water damage unless optional sewer backup coverage is purchased separately.
Frozen Pipes in Unheated Areas
If pipes freeze and burst in uninsulated or unheated areas like attics or crawl spaces, the resulting damage may be denied coverage.
Plumbing System Replacements
While repairs to specific plumbing failures are often covered, full replacements of entire plumbing systems due to age or deterioration are often excluded.
Filing a Successful Claim
While the claims process can seem complicated, following the right steps is important in achieving a successful claim. Contact your insurer immediately to understand their specific requirements like claim forms, deadlines, and documentation needed.
Check out our comprehensive guide on how to make a successful water leak insurance claim in Australia for step-by-step instructions.
Preventive Measures to Avoid Insurance Claims Altogether
In order to prevent the unexpected issues, costly repairs and time spent on insurance claims you need to be proactive. Regular plumbing maintenance not only extends the life of your plumbing but also helps catch potential problems before they escalate.
Routine Plumbing Maintenance: Regular checks can identify minor issues before they become major problems. This includes inspecting pipes and flexi hoses for signs of wear, checking for leaks, and ensuring that all fittings are tight and secure.
Address Small Issues Promptly: Don’t ignore minor drips, running toilets or other small plumbing problems. Getting them fixed quickly by professionals prevents them from worsening into larger, costlier repairs.
Early Detection Tools: Installing water sensors can provide an early warning of leaks. These devices detect water presence where it shouldn’t be, alerting you to take immediate action.
Professional Inspections: Having a professional plumber inspect your plumbing system, especially in high-risk areas like under sinks and around water heaters, is crucial. They can assess the health of your system and perform any necessary repairs or replacements.
Insulate Exposed Pipes: In colder months, properly insulating pipes in unheated areas like attics, crawlspaces and exterior walls prevents freezing and potential bursts.
DCM Plumbing’s Maintenance Solutions
At DCM Plumbing, we understand the importance of a reliable plumbing system. If you’re unsure about the state of your plumbing or need professional guidance on home insurance coverage for plumbing issues, we’re here to help.
Our expert team is equipped to provide thorough inspections and maintenance, ensuring your plumbing is in peak condition. Don’t wait for a disaster; protect your home today. Contact us today for a comprehensive plumbing health check and experience the peace of mind that comes with expert care.
Toilet bowl stains, an unfortunate but common household issue.
Despite regular cleaning, do you find your stubborn marks won’t budge? Then it might be time to level up your approach and test out these expert methods for toilet bowl stains.
This guide offers practical solutions for tackling stubborn stains, whether you’re dealing with hard water residue or mysterious marks, follow these tips for a sparkling clean toilet.
What Causes Toilet Bowl Stains?
Unsightly toilet bowl stains are more than just an eyesore; they can offer insights into the water quality and hygiene practices in your home.
Hard Water Deposits
Areas with hard water suffer from a high concentration of calcium and magnesium. These minerals form chalky deposits that not only discolour the toilet bowl but can also affect its flushing efficiency over time. The white or grey buildup is not just a cleaning challenge but a sign that your water might be too mineral-rich.
Mineral Deposits
Iron and manganese are minerals that, while naturally occurring, can cause significant staining in your toilet bowl when present in your water supply. Iron deposits typically leave behind reddish or brown streaks that are notably tough to remove. Manganese, though less common, creates black or purple marks, giving the appearance of a toilet bowl in neglect.
Bacterial Blooms
One of the most common bacterias, Serratia marcescens, is notorious for its pink or red biofilm, often mistaken for a mineral stain. However, it’s actually a living organism, thriving on moist surfaces and feeding on fatty substances like soap residue. Other bacteria can produce stains ranging from orange to yellow, highlighting the need for regular cleaning and disinfection.
Rust
Old pipes or the internal mechanisms of the toilet tank can succumb to rust over time, especially if they’re made of metal. This rust, when mixed with water, can seep into the toilet bowl during each flush, depositing reddish-brown stains. These stains can also indicate potential plumbing maintenance issues that might require attention beyond just cleaning.
How to Remove Stubborn Stains from Toilet Bowl
For those persistent stains that refuse to budge with regular cleaning, here are some at home remedies for tackling stubborn toilet stains:
Vinegar and Baking Soda
- Pour one cup of vinegar into the toilet bowl, making sure to coat the stained areas thoroughly.
- Allow it to sit for a minute, then add a cup of baking soda followed by another two cups of vinegar.
- Witness a fizzing reaction which helps loosen the stains.
- Leave the mixture to work its magic for about ten minutes.
- Scrub the bowl with a toilet brush, focusing on stained areas. The abrasive action of baking soda combined with vinegar’s cleaning properties will help lift stubborn marks.
- Flush the toilet to rinse away the residue.
Borax and Vinegar
For even tougher stains:
- Sprinkle a generous amount of borax over stains.
- Pour a cup of vinegar over the borax and let the mixture sit for 20 minutes. The longer duration allows the solution to penetrate and break down the stains.
- Scrub vigorously with a toilet brush, ensuring you cover all stained spots.
- Flush the toilet to wash away the cleaning mixture and dislodged stains.
For best results, repeat these steps if necessary, or consider leaving the mixture to sit overnight for deep-set stains.
Coke/Cola
As unsettling as it may be, surprisingly, coke can double as an effective cleaning agent for removing stubborn stains from your toilet bowl. The acidic nature aids in breaking down stains, especially those caused by hard water and mineral deposits.
- Empty a can or bottle of Coke into the bowl, aiming to cover the stained areas thoroughly.
- Allow the Coke to sit for at least an hour, but for tougher stains, leaving it overnight increases its effectiveness.
- After letting it sit, use a toilet brush to scrub the stains. The combination of Coke’s acid and the physical action of scrubbing should loosen and lift most stains.
- Finally, flush the toilet to rinse away the residue. If any stains remain, repeat the process or consider using a stronger cleaning agent for particularly stubborn areas.
Preventing Toilet Bowl Stains
Regular Cleaning: Incorporate toilet cleaning into your regular housekeeping routine. Using mild cleaners for weekly maintenance can prevent stain-causing minerals and bacteria from settling.
Water Softeners: For households with hard water, installing a water softener can significantly reduce mineral buildup in your plumbing and toilet, keeping those chalky deposits away.
Use Automatic Bowl Cleaners: Drop-in tank tablets can continuously clean your toilet with every flush, keeping stains and bacteria growth in check. Choose a cleaner compatible with your toilet components to avoid any potential damage.
Address Plumbing Issues: Rust stains often indicate corroding pipes or fixtures. Inspect your plumbing for any signs of rust and replace parts as necessary. This not only prevents stains but also protects your home’s plumbing integrity.
Flush Regularly: Even unused toilets should be flushed regularly to prevent stagnant water from staining. This is particularly important for guest bathrooms or any toilet that doesn’t see daily use.
Vinegar Flushes: Occasionally flushing your toilet with vinegar can help neutralise pH levels and dissolve beginning mineral deposits before they become visible stains.
DCM Plumbing: Your Ultimate Plumbing Solution
If you’ve tried every method and still find yourself battling persistent toilet bowl stains, it might be time to call in the experts. DCM Plumbing specialises in comprehensive toilet plumbing solutions, including toilet maintenance and repairs.
DCM Plumbing and Drainage are members of the Master Plumbers Association of Queensland and fully licensed with QBCC (Queensland Building and Construction Commission) to carry out all repairs and replacements for toilets.
For complete peace of mind and fast, courteous service, call DCM Plumbing and Drainage on (07) 5576 5305.
Installing a toilet suite might seem like a job that requires professional help, but with the right tools and guidance, you can actually DIY it. Whether you’re in Australia or elsewhere, this guide breaks down the process of installing a toilet.
Identifying if Your Toilet Needs Replacement
When contemplating whether your toilet needs a replacement, there are several telltale signs to look for.
- Persistent clogs that resist plunger and auger interventions, hint at deeper issues possibly related to the toilet’s design or an obstructed trapway.
- Cracks in the porcelain, whether visible in the bowl or the cistern, can lead to leaks and structural failure over time. Moreover, if you notice water pooling around the base or leaks that persist after replacing the wax ring, it might be time for a new toilet.
- Additionally, older toilets use significantly more water per flush compared to modern, water-efficient models. Upgrading to a newer toilet not only conserves water but can also lead to noticeable savings on your water bill. If you’re experiencing any of these issues, it might be time to consider replacing your toilet.
Tools and Materials Needed
Once you’ve determined that your toilet needs replacing or you’re just ready for an upgrade, here are the necessary tools and materials you will need before you begin the installation:
- Shifter spanner (adjustable wrench)
- Putty knife
- Sponge and bucket
- New wax ring
- Toilet bolts
- Spirit or digital level
- Silicone caulk
- Screwdriver
- Cloth or towel
- Flush Pipe
- A new toilet suite (and its components)
Step-by-step guide on installing a toilet
Before you start
Before purchasing a new toilet, you need to make sure you buy one that fits in the place of your old one. To do this, measure the rough-in size before installing your toilet. This is the distance from the wall to the centre of the floor drain (in the direction your toilet faces). It can be hard to tell the exact distance, but the drainpipe should be located in the centre of the floor bolts of the toilet. Standard rough-in size in Australia is 140mm, but they can go up to 165mm or even 180mm. If your measurement doesn’t equal 140mm, check again to make sure you got it right, and make sure to choose a new toilet that fits!
Another thing that needs to be checked before getting started is that if you are replacing only the cistern or only the pan, that your new component is compatible with the old. The design of both components should match to ensure efficient flushing and water conservation. If the cistern and pan are sold separately, check the manufacturer’s specifications to confirm they’re intended to work together.
Part one: removing the old toilet
- Locate the shutoff valve near the base of the existing toilet and turn it clockwise to shut off the water. Flush the toilet to drain the water from the cistern and bowl. If there is any excess water left, get rid of it with a mop or sponge.
- Unscrew the water supply line from the cistern. Have a bucket handy to catch any water.
- Remove the caps covering the bolts at the base of the toilet, then unscrew the nuts. If the bolts are rusted, you may need a hacksaw to cut them off.
- Rock the toilet gently to break the seal with the floor and lift it away. It’s a good idea to have someone help you with this step as toilets can be heavy. Place the old toilet on a trash bag or old towel to avoid mess.
Part two: preparing the area for the new toilet
- Remove any remnants of the wax ring from the floor flange (the fixture attaching your toilet to the drain pipe) and around the drain hole. Check the flange for damage; it should be securely attached to the floor. If the flange is damaged or worn, a replacement may be necessary.
- Use your level to ensure the flange is even with the floor. An uneven flange can lead to a poor seal and potential leaks (which we obviously don’t want)!
Part three: installing the new toilet
- Position a new wax ring on the flange. Some prefer a wax-free silicone ring for a mess-free installation and a good seal.
- Carefully align the toilet over the flange, using the bolts as a guide. Press down firmly to set the wax ring.
- Place the washers and nuts on the bolts and tighten them gradually, alternating sides to apply even pressure. Be careful not to over-tighten, as this can crack the porcelain.
- Install the cistern, placing the cistern atop the pan, making sure it sits evenly and securely.
- Connect the flush pipe from the pan to the cistern. Ensure the flush pipe’s seals are intact and correctly positioned before connecting. This step might require some adjustment to achieve a snug fit and maintain the integrity of the water flow from the cistern to the bowl.
- Reattach the water supply line to the toilet cistern. Turn on the water supply and allow the cistern to fill.
Part four: final steps
- Follow the manufacturer’s instructions to attach the toilet seat.
- Once the cistern is full, flush the toilet several times to ensure everything is working correctly. Check for leaks around the base and where the water supply line connects to the cistern.
- Applying caulk around the base of the toilet is optional but recommended for a neat finish and to prevent water from getting under the toilet.
FAQs About Toilet Installation
Do I need special tools to install a toilet?
While basic hand tools can accomplish most of the installation, having a wrench set, a level, and a hacksaw can be particularly useful. A wax ring, toilet bolts, and possibly a new supply line might be needed as well.
How do I know if the new toilet will fit my bathroom?
Measure the “rough-in” distance, which is the space between the wall behind the toilet and the centre of the drainpipe or bolts that hold the toilet to the floor. Most toilets are designed for a 140mm rough-in.
Can I replace an old toilet with any new model?
Yes, but ensure the new toilet’s dimensions fit your space and the rough-in distance matches. Also, consider the toilet’s design for compatibility with your bathroom’s style and plumbing.
What should I do if the toilet wobbles after installation?
A wobbling toilet often means the floor isn’t level or the bolts aren’t tight enough. Use or wedge shims to stabilise the toilet and ensure the bolts are snug, but don’t over-tighten them as this can crack the porcelain.
How do I prevent leaks between the toilet and the floor?
Ensure the wax ring is properly seated and creates a watertight seal between the toilet base and the drain flange. If leaks persist, the wax ring may need to be replaced or repositioned.
Is it normal for the toilet to have a slight leak after installation?
No, any leaks indicate a problem, such as a faulty seal or loose connections. Check the installation points carefully and address any issues immediately to prevent water damage.
Additional Tips
When considering installing a toilet in Australia, remember to be mindful of your local plumbing codes and water efficiency standards. Should you encounter any challenges along the way, or prefer the assurance of professional installation, DCM Plumbing is here to help. Our experienced team ensures your toilet installation meets the highest standards, offering you peace of mind and reliability. Ready to upgrade your bathroom? Contact us today for expert plumbing services.
A clogged bathroom sink is a common yet annoying problem in many households. It’s often caused by a buildup of hair, soap scum, and other debris, and figuring out how to unclog a bathroom sink can be difficult.
Fortunately, we’re here to help! Unclogging a bathroom sink is usually a simple task that doesn’t require professional help or expensive cleaning products.
How to Unclog a Bathroom Sink with Standing Water
For sinks with standing water, it indicates a complete blockage where the water cannot pass through at all, often requiring mechanical removal or dissolution of the blockage. If the sink drains slowly, the clog might be partial, providing more flexibility in the choice of unclogging methods, ranging from natural solutions to manual extraction.
- Begin by removing as much standing water as possible from the sink. You can use a cup or a small container to scoop the water out and then wipe the remaining moisture with a sponge or cloth.
- A plunger can be effective even for a sink. Cover the overflow hole with a wet cloth to ensure a vacuum, place the plunger over the drain, and pump it several times. This action can dislodge the blockage, allowing water to drain.
- Checking the P-Trap. The P-trap is the curved section of the pipe under the sink. Place a bucket underneath to catch any spillage, then unscrew the P-trap. Check it for obstructions and clean it out if necessary.
- If the clog isn’t in the P-trap, it might be further down. A plumber’s snake can help reach deeper clogs. Insert it into the drain and turn it to catch and pull out the obstruction.
- After clearing the blockage, flush the drain with hot water to wash away any remaining debris.
This method can effectively remove the clog, allowing water to flow freely again. Remember, if these steps do not resolve the issue, it might be time to call a professional plumber to avoid further damage to your plumbing system.
Unclogging Hair from your Bathroom Sink
Step 1. Manual Removal
Often, hair clogs are located near the drain surface. Wearing gloves, remove the stopper and use a wire hanger or a specialised drain cleaning tool to fish out the hair. These tools are designed to snag hair, making it easier to pull out of the drain.
Step 2. Baking Soda and Vinegar
If the hair is further down the drain, a natural cleaning solution can help. The fizzing action can help break down the hair clog. Let it sit for an hour, then flush with hot water.
Step 3. Plunger
After attempting to manually remove hair and using a natural cleaner, try using a plunger to dislodge the remaining clog. Cover the overflow hole and create a seal around the drain with the plunger for effective suction.
Step 4. Plumber’s Snake
For persistent clogs, a plumber’s snake is more effective. Carefully feed the snake into the drain until you feel resistance, then rotate it to catch the clog. Pull it out slowly to remove the hair.
Top 4 Natural Remedies for Unclogging a Bathroom Sink
Baking Soda and Vinegar
As mentioned earlier, baking soda and vinegar is a great go-to method.
- Begin by pouring a pot of boiling water down the drain.
- Follow it with a cup of baking soda and let it sit for a few minutes.
- Then, add a mixture of one cup vinegar and one cup hot water on top of the baking soda.
- Cover the drain with a plug or a rag to keep the reaction below the surface, enhancing its effectiveness in breaking down the clog.
- After 5-10 minutes, flush the drain with another pot of boiling water.
Salt, Baking Soda, and Vinegar
For tougher clogs, add half a cup of table salt to the baking soda before pouring it down the drain. Then follow the steps mentioned above.
The abrasive nature of salt helps in breaking down the clog.
Dish Soap and Hot Water
- Dish soap can help lubricate the clogged pipe, making it easier for the obstruction to slide out.
- Pour a generous amount of liquid dish soap down the drain, followed by a pot of boiling water.
- The soap acts as a lubricant, helping to break down any greasy residue that’s part of the clog.
Wire Hanger
Sometimes, the clog needs a little agitation to break apart.
- Straighten a wire hanger, leaving a small hook on one end.
- Insert it into the drain to fish out or break apart the clog.
- Be careful not to push the clog further down.
Preventative Tips for a Clog-Free Bathroom Sink
Adopting a proactive stance can save you time, money, and the hassle of dealing with recurring blockages. Here are some easy-to-follow preventative measures:
Regular Cleaning
Make it a habit to clean your sink weekly. Use a mixture of hot water and mild detergent to wash away potential clog-causing grime. For a more thorough clean, consider a bi-monthly regimen with baking soda and vinegar to keep the drain clear and odour-free.
Sink Strainers
A simple yet effective tool, sink strainers catch hair, soap bits, and other debris, preventing them from going down the drain. Ensure the strainer fits well and clean it out regularly.
Mindful Disposal
Be conscious of what goes down your sink. Avoid disposing of oily substances, coffee grounds, and bulky materials that can solidify or accumulate in your pipes, leading to clogs.
Regular Maintenance
Incorporate a routine check and maintenance of your plumbing system. This could mean using enzymatic drain cleaners that break down potential clog materials without damaging your pipes.
Call DCM Plumbing for Any Stubborn Blocked Bathroom Sinks
If none of the methods above help with your blocked sink, it’s time to call in the experts at DCM Plumbing. Our skilled team is equipped to handle even the most stubborn blockages, ensuring your drains are cleared efficiently and effectively. We use professional tools and techniques to diagnose and resolve the issue, preventing future problems.
Don’t let a blocked sink disrupt your daily routine – contact DCM Plumbing for prompt and reliable service.
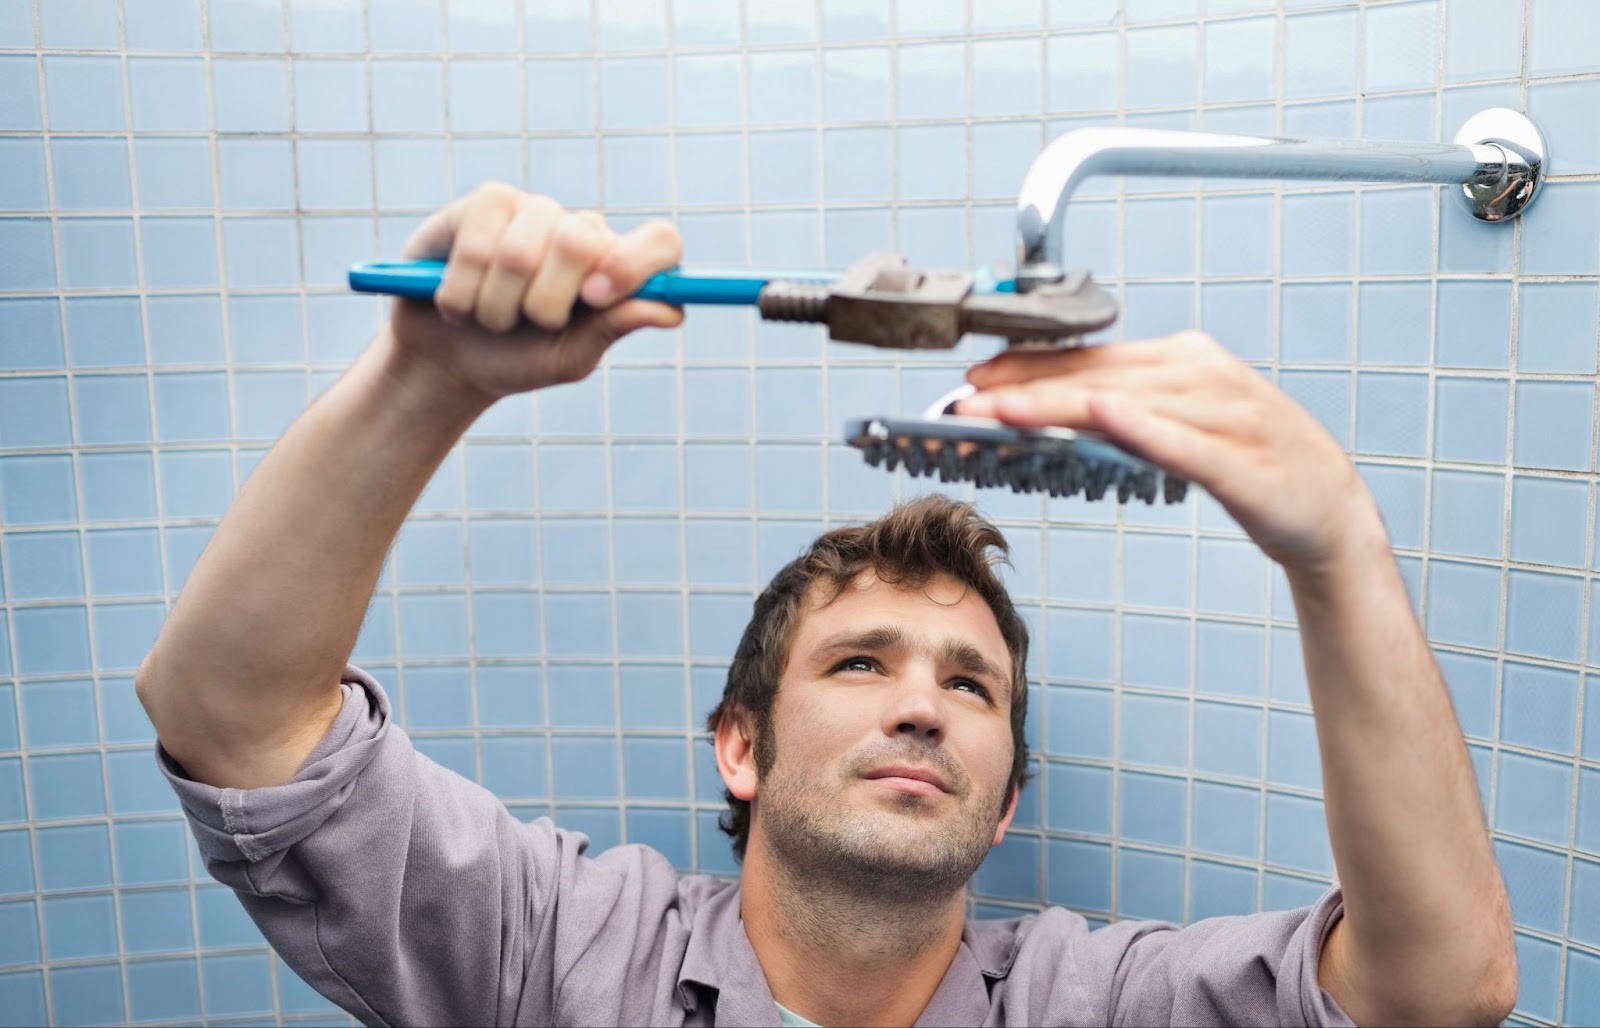
Want to learn how to change a shower head? We’re here to help!
Changing a shower head doesn’t require extensive tools or expertise, and it’s an easy bit of DIY you can do to save water by purchasing a more effective shower head, or to just upgrade to a shower head more in line with your preferences. Whether it’s your first time replacing a shower head or you’re simply seeking a quick refresher, our instructions are there to assist you every step of the way.
DCM Plumbing is a leading plumber on the Gold Coast and blocked drains expert. If you need plumbing services of any kind such as leak detection, burst pipe repairs, or renovations contact us today.
Different Types of Shower Heads
When changing your shower head, you first need to figure out what type of shower head you have. Here are some common types to help you along:
1. Fixed shower heads are common and provide a stable overhead water flow.
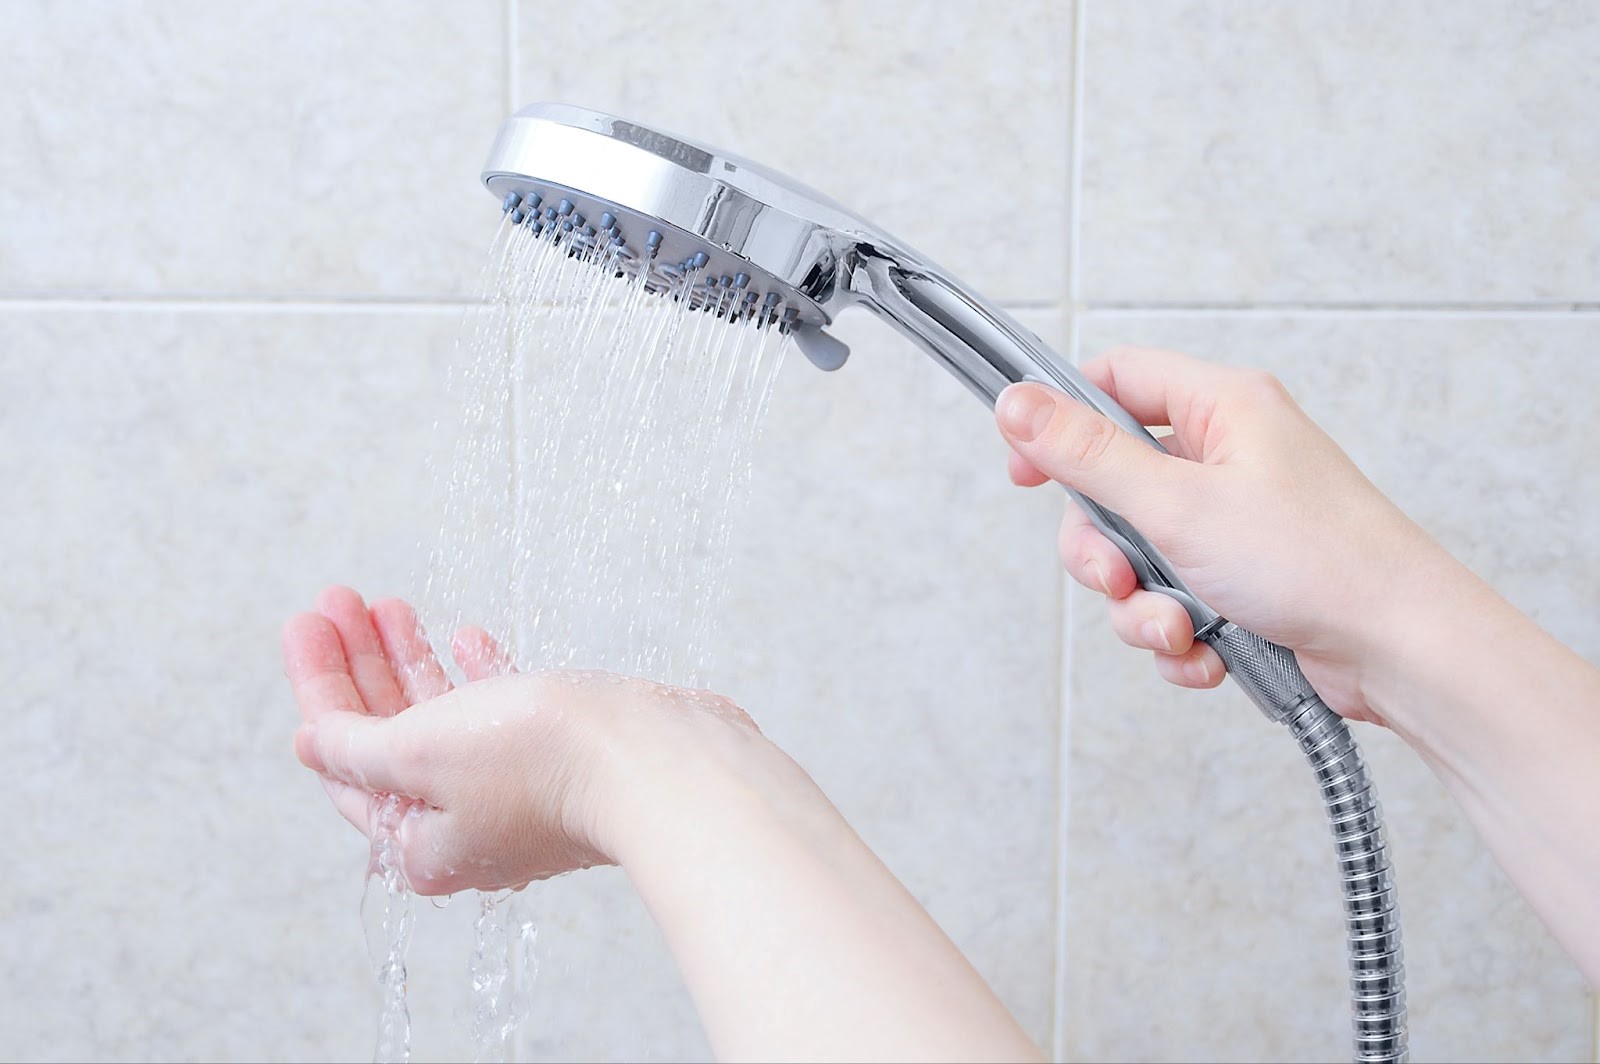
2. Handheld or mixed shower heads offer flexibility, allowing you to direct the water flow where needed, ideal for families with varying height requirements. Just be aware that these types can be more prone to leaks due to the flexi hose and connection.

3. Rain shower heads are designed for a luxury showering experience, mimicking the gentle fall of rain for a soothing effect.
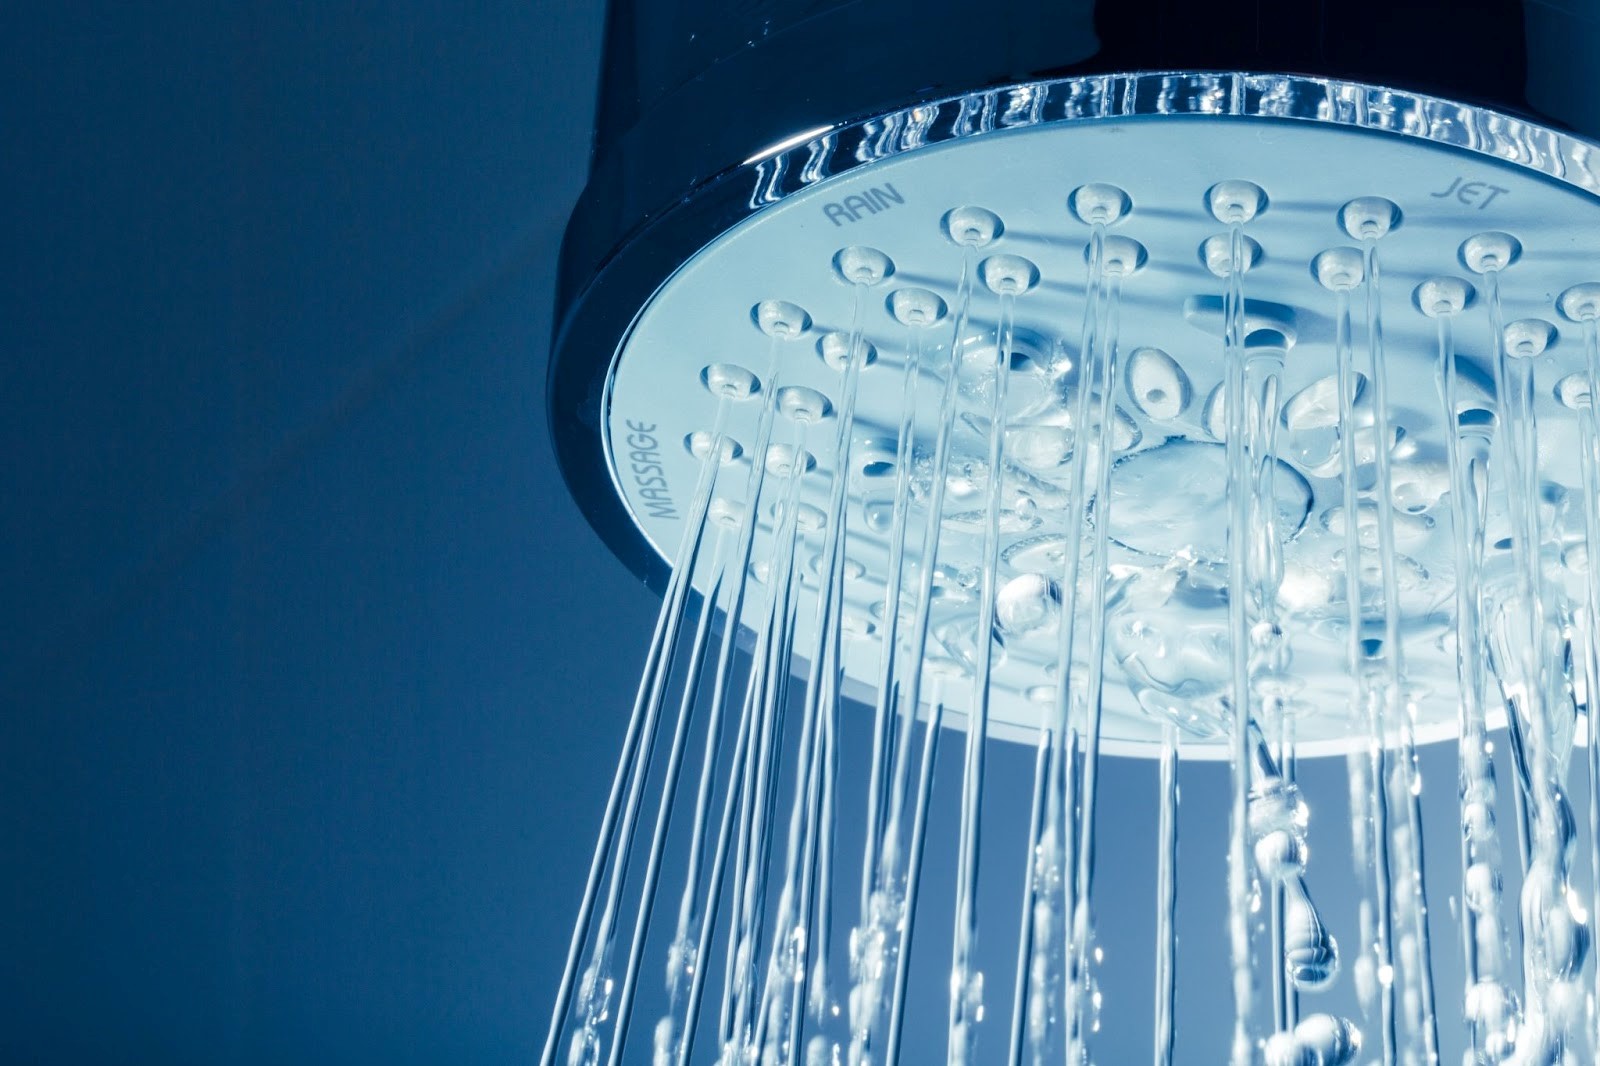
4. High-efficiency shower heads are engineered to reduce water usage without compromising on pressure, catering to eco-conscious consumers.
Tools and Materials You Will Need When Changing a Shower Head
Before you get started, ensure you have the following items:
- Adjustable wrench (shifter spanner)
- Teflon tape (AKA Plumber’s Tape)
- Stool or Ladder
- New Shower Head
- Cloth or Rag
- Bucket and Towels
Step-by-Step Instructions: Replacing Your Shower Head
Removing the Old Shower Head
- Turn off the taps. Ensure your shower taps are turned off completely to prevent any unwanted accidents!
- Protect the finish. Wrap a cloth around the base of the old shower head. This will protect its finish as you unscrew it.
- Loosen and remove. Using the shifter spanner, gently loosen the old shower head by turning it anticlockwise. Once loose, finish unscrewing by hand and remove it.
Preparing the Shower Arm
- Clean the threads. Remove any old Teflon tape or debris from the threads of the shower arm to ensure a clean surface for the new shower head.
- Apply Teflon tape. Wrap new Teflon tape clockwise around the threads of the shower arm. This helps prevent leaks by ensuring a tight seal.
Installing the New Shower Head
- Hand tighten. Position your new shower head onto the shower arm and screw it in by hand, turning clockwise. Ensure it’s straight and securely attached.
- Final tightening. Using your wrench with a cloth to protect the finish, gently tighten the shower head to ensure it’s snug. Avoid over-tightening to prevent damage.
Testing for Leaks
- Turn on the water. Once the new shower head is securely in place, turn the water supply back on.
- Check for leaks. With the water running, inspect the connection between the shower head and the arm for any signs of leaking. If you notice any drips, turn off the water and slightly tighten the connection until the leak stops.
Congratulations, you did it! Your new shower head is ready to enjoy.
Should you ever feel uncertain or face challenges at any point along the way, give our expert team a call and we can put your mind at ease, by ensuring the installation is completed safely and accurately.
Ready for a Plumbing Upgrade?
If you’re feeling inspired after installing your new shower head and are considering further bathroom renovations, DCM Plumbing is here to help. From minor fixes to major overhauls, our expert team is ready to provide you with the best plumbing services on the Gold Coast.
Disclaimer:
While we provide experienced advice on how to replace a shower head, it’s important to remember that these instructions are intended to serve as a general guide. Shower heads can vary significantly in design, functionality, and installation requirements. Therefore, it’s important to check the instructions provided with your new shower head that are tailored to your particular model.
Dealing with a water leak can be stressful, so let us help to try and take the stress out of the insurance claims that follow a water leak incident.
In this blog we guide you through the process of filing a water leak insurance claim in Australia.
We’ll cover everything from understanding the specifics of your coverage to providing practical tips on submitting your claim and preventative measures to help avoid the whole thing. Whether it’s a leaking roof or a broken water line, knowing how to effectively manage your insurance claim can make all the difference in securing the support you need for repairs and recovery.
Is There a Difference Between a Water Leak and Water Damage?
Water leak refers to the escape of water from plumbing systems or structures due to faults or failures, such as a cracked pipe or a loose connection. Water damage, on the other hand, results from water intruding where it can lead to destructive processes like rotting of wood, mould growth, rusting of steel, delamination of materials, and others. Essentially, a water leak is the cause, and water damage is the consequence.
Understanding Your Insurance Policy
To effectively submit a water leak insurance claim in Australia, you need to have a thorough understanding of your insurance policy, in particular your product disclosure statement. This means looking into the specifics of what is covered, especially regarding water leaks and related damages. Policies differ, and it’s key to find out whether incidents like “roof leaks” or “water line breaks” are covered.
In general, most insurance companies will not cover gradual water damage. A gradual water damage example could involve a slow leak from a pipe within a wall. Over time, this unnoticed leak can lead to significant structural damage, mould growth, and deterioration of wall materials.
However most policies do include sudden and accidental damage, an example of this could be a washing machine hose bursting while in use, causing an immediate flood in your laundry room. This type of event is typically covered by homeowners’ insurance because it is unexpected and not due to lack of maintenance or negligence.
When dealing with specific scenarios like roof leaks or burst water lines, it’s also important to know how your insurance policy responds. For roof leaks, check if your policy includes storm or accidental damage coverage. For water line breaks, determine if the policy covers repairs and water damage cleanup. Each scenario requires different documentation and proof of damage, so understanding your policy’s specifics helps navigate these situations effectively.
Familiarising yourself with these details helps you to advocate for your rights more effectively during the claim process, ensuring you’re prepared to present your case comprehensively. Always consult your insurance provider for the most accurate and detailed information regarding your coverage.
Making a successful Water Leak Insurance Claim
Now that we have clarified those points, let’s get into the details of making a successful water leak insurance claim. There are many insurance companies in Australia that work in their own ways but as a general guide this is what you need to know:
1. Immediately Document the Damage
As soon as you notice any water damage, it’s critical to start documenting everything. Take clear photos or videos from multiple angles, highlighting where the damage has occurred and its extent. If possible, include timestamps. This initial evidence can significantly strengthen your claim by providing your insurer with a clear understanding of the damage’s initial state. For instance, if a pipe bursts in your kitchen, capture the source of the leak, any standing water, damaged flooring, and affected appliances. This visual record will be important during the claims process.
2. Review Your Insurance Policy
As mentioned earlier, examining your insurance policy is essential to fully grasp your coverage related to water leaks. Look beyond general statements to find detailed explanations of what types of water damage are covered, such as damage from sudden leaks compared to ongoing neglect. Check the specifics of coverage limits, which dictate the maximum amount the insurer will pay for a claim, and note any excess you’ll need to pay.
3. Mitigate Further Damage
It’s important to act swiftly to minimise further damage once a water leak is discovered. Shutting off the water supply can prevent additional flooding, and covering leaks with temporary patches can reduce water spill. If you undertake emergency repairs, such as using a plumber to stop a leak or hiring professionals to dry out flooded areas, ensure you keep all receipts and records of the work done. These documents are required for your insurance claim, as they prove you’ve taken responsible steps to protect your property from further damage.
4. Contact Your Insurance Provider
When contacting your insurance provider, do so promptly. This initial contact is important as your insurer will outline the specific steps for filing your claim, including the necessary documentation and deadlines. They may require photos of the damage, repair estimates, and a detailed account of the incident. Following their guidance ensures your claim matches policy requirements, facilitating a smoother process. Keep a record of all communications with your insurer for reference throughout the claim process.
5. Fill Out Claim Forms Promptly
Filling out claim forms promptly and accurately is a must. Ensure you provide all required information, such as the extent of the water damage and any emergency repairs undertaken, backed by supporting documentation like photos, repair quotes, and receipts. This detailed submission helps the insurance adjuster understand the claim’s validity and urgency, potentially speeding up the approval process. Attention to detail and thoroughness in this step can significantly influence the outcome of your claim.
6. Assessment by an Adjuster
If/when an insurance adjuster visits to assess water damage, ensure you’re ready to clearly demonstrate the damage’s scope. Prepare to walk them through the affected areas, highlighting the damage’s impact and discussing necessary repairs. This is an opportunity to present your case effectively, ensuring the adjuster fully understands the extent of the damage and the justification for your claim. Being organised and forthcoming with information can facilitate a more accurate assessment and smoother claim process.
7. Keep Records
Keep a clear record of every interaction with your insurance company. This includes saving emails, writing down what was discussed in phone calls, and noting any decisions about your claim. Keeping everything organised in one place can help if you need to look something up or if there are any questions later on. This careful tracking can help make sure your claim goes smoothly.
Tips for Water Leak Prevention
Who wants to spend their valuable time doing all of that? Not us and probably not you.
If you are a homeowner it pays to be proactive. Preventing water leaks (such as from burst flexi hoses) involves regular maintenance and inspections. By taking a little bit of time doing the steps below it can end up saving you a whole lot of time and money in the long run.
- Ensure plumbing systems, including pipes and appliances, are in good condition.
- Installing water detection devices can alert you to leaks early.
- Keep gutters and downpipes clear to prevent water buildup.
- Insulate pipes to prevent freezing and bursting in cold weather.
- Being proactive and addressing small issues promptly can significantly reduce the risk of major water leaks and the subsequent damage they can cause.
Leak Detection Services
At DCM Plumbing, we understand the stress and damage a water leak can cause, which is why we offer specialised leak detection services on the Gold Coast. Our experienced team uses the latest technology to swiftly identify and repair leaks, preventing further damage and aiding in the process of making successful water leak insurance claims. Our goal is to minimise disruption and costs for our customers, ensuring peace of mind and security in their homes. For more about our leak detection services and how we can help protect your property, visit our leak detection page or burst pipe page.
DCM Plumbing are family run team of professional plumbers. Our team is dedicated to supplying a professional plumbing and drainage service throughout the Gold Coast. We have been servicing residential and commercial properties since 2002 within Burleigh Heads and throughout the Gold Coast region.
- About Us
- Why Choose Us
- Meet Our Team
- Locations
- FAQ’s
- Who We Work With
- Residential
- Commercial
- Real Estates / Body Corporates / Strata Managers
- Builders

Google Rating
5.0
Based on 1231 reviews
DCM Plumbing & Drainage Pty Ltd
5.0

Steve Morton
1721872836
Christian called prior to his on time arrival. Resolved my drain issue and tested and checked taps etc around the house. Good friendly service. Thanks to DCM

Reece Gardiner
1721870814
Jackson and the DCM team have always looked after me with honest and reliable advice and service! Thanks for everything guys and look forward to continuing to work together into the future


Rose Manly
1721600850
Very efficient quickly fixed our leaky tapAlso checked other taps after I paidWill definitely use again


Michael Gilligan
1720758318
Jackson and Tate did a great job today connecting up our outdoor shower and fixing flow issues we have had. Thanks also to Sam for stopping in and consulting.

Kathryn Molloy
1720752123
Great service highly recommend the handsome skilled young plumber who worked in my unit today. Is he single?


Grahame ELLIOTT
1720503661
This is the best company I've ever done business with. They handled the job flawlessly and efficiently—truly top professionals.

Tracey Purdon
1720490806
Jackson and Tayte completed the rough in for our bathroom reno. Very happy with the work. Excellent communication and great workmanship. Thank you


Martin Zumstein
1720150665
Tate and Jackson were great. We started with one issue and they did a survey of the house and found a few more key issues. Resolved super quick and excellent quality

Russell Ayres
1720134976
Outstanding work. Job completed quickly. Jackson and Tate a fantastic job repairing storm water issue.

Richard Wills
1719552911
We had a burst pipe that needed locating and fixing. DCM had a really quick turn around, and were extremely friendly. I would recommend to anyone.

P. Golangade
1719458618
Our positive experience with DCM plumbing started right from our phone request to Karlien. She conveyed exactly what we required and a plumber was confirmed so quickly. We had a list of pending plumbing jobs (including dripping taps, bidet install, toilet cistern issue etc.) and were assigned the perfect plumber (Christian), chosen specially for our plumbing issues from DCM’s expert team. I was sent a text in advance with the arrival time and plumber details, so it was easy to plan our day. The plumber Christian’s professionalism and dedication to customer service truly impressed me. He told me the cost before starting and their charges are fair and transparent, offering great value for money. I highly recommend this company!

RossLyn Bassani
1719448345
Another big thank you to DCM Plumbing & Drainage for the excellent job repairing our blocked sewer pipe. Jackson from DCM cleared the tree roots and replaced the broken pipe. It was a big job and we were very impressed with his persistence and his workmanship especially with having to work around the roots of a huge leopard tree. He was ably assisted by Rod on the excavator who was an amazing operator.. We are extremely happy with the work carried out by Jackson and Rod. Thank you again DCM.

Jasmine Fitzgerald
1719434504
Second time we’ve used DCM plumbing and we could not rate them highly enough. We experienced lovely service from booking right through to our plumber. Lloyd completed several jobs over a few hours thoroughly and for a reasonable price. We would 100% recommend and will use for future jobs.Thanks guys and keep up the great work!

Ben Callan
1719282714
Angus did a great job. He was prompt, recommended the best products and carried out all work efficiently and professionally.. definitely will recommend to my friends and family.

Josh Maslij
1719207886
This is the 2nd time we have used DCM plumbing over the past year for seperate reasons.I can honestly say that they are the most efficient business I’ve ever dealt with.An enquiry email and quote was sent back very quickly and communication was great.Logan turned up right on time and was a really friendly bloke.He helped us out with a couple other things we had while he was here.We will use them again

Adam and Robyn
1718773092
Jackson arrived before schedule and was a pleasure to deal with. The quality of work was faultless. Thanks Jackson, job well done


Matt Hodges
1718619313
Great experience from start to finish.Angus was a champion and got the job done straight away. 👍

Adam Turbill
1718604526
Super responsive, professional and friendly service. Angus was great and I will definitely continue to use the team at DCM for all my plumbing needs!


Samantha Webb
1718580986
Used to be a great company but no I would nor recommend, very poor standards and professionalism; dragged dog mess and dirt though the house and shower , cracked a tile, completed a small job in 5 minutes then proceeded to stay outside in their van outside being extremely loud and disruptive for over 40 minutes ‘while attending notes’ , then came backAfter the 40 minutes to take another photo . when I enquired how this could come to over $340 for 2 taps, and a shower tape application, when asked for a break down I was told it was $266 for one basic outside tap and $75 for a second . Very disappointed would use again or recommend to other women.


Adrian Bisa
1718148448
Jackson identified the problem quickly and fixed it with no fuss and was friendly and professional to deal with.


Waveley Wilton
1717632478
The plumber guy is very good. He gives us details on what happened. He did a great job.👏🏻


Bianca Hunter
1717551161
Great support from admin staff. Jackson (plumber) was prompt & extremely helpful.Everything was done within 72 hrs

Nicole West
1717122224
Very professional. Was upfront and clear about the quote. Highly recommend DCM.


Antoinette Wydeveld
1717053181
Christian arrived very quickly to help us with our blocked drains. He was extremely helpful, courteous and informative. We would recommend Christian to all. Thanks for everything 😀


Wayne Hawking
1717031314
Would not recommend for leak detection.They ask for payment up front and do not advise they use an independent leak detection company and then quote to fix the leak at a later date, leaving you with a leak until they come.

Desiree Koppen
1717030315
We had a burst Mains pipe and were losing hundreds of litres of water. We called DCM and they sent out a Leak Detector and their star plumber Jackson to repair the problem.Jackson went above and beyond, digging down and under our pool coping because we didn’t want to cut through the concrete surrounds of our brand new pool. After 8 hours of digging and covered in mud Jackson advised us the best course of action was to redirect the water into a new pipe. He and Tate were out again the next morning digging a new channel, relaying all the pipe and testing everything to make sure the fix was perfect. And then repairing our yard and leaving the site looking amazing.I can not say enough about how professional, knowledgeable and hard working Jackson and Tate were. They communicated with me for every step and the price was AMAZING. We have had a lot of plumbing work done and I will definitely be using DCM from now on.If you have an emergency or a difficult to reach plumbing problem, these are the guys for you.

Rosemary Peterson
1717023304
Excellent service!! Jackson was super lovely and professional and highly recommend!!


Sean Casey
1716517907
DCM were brilliant; especially Jackson who went above and beyond to make sure we had a good experience after dealing with a different company who did a poor job. Cannot recommend enough!

Daniel Byrne
1716445112
Jackson from DCM provided an exceptional level of service when dealing with a water leak behind our laundry wall. Resolved the issue effectively and efficiently and for a very fair price. Will be recommending Jackson and DCM for all plumbing needs moving forward.

Martin Rafferty
1715926801
Burst main water pipe under concrete along the side of the house. Jackson assessed the situation ordered the leak detection company were they marked the leak. Jackson cut the concrete, repaired the mains pipe and reinserted the cut concrete.Professional repair by Jackson and very pleasant to deal with. Jackson maybe young but he has plenty of experience and knowledge.

she mc
1715910416
The service from booking the job to completion was absolutely outstanding. Logan and Luke were very efficient, friendly and considerate. Highly recommended!

Matt van der Riet
1715910370
Jackson was awesome. Job done, great service, good bloke. Thanks DCM team

Stuart McMurray
1715904795
What a awesome experience to deal with the team That is from first phone call taken by Meredith to last thank you txt sent at completion of totally proffessional job supply and install new hot water system to replace old unit. You deal with real people that work at company thats based where they state they are. Never had easier dealings in this industry from what i had to what i needed to rectify the issue. Just excellent whole process from able to quote fixed price by photos sent to them. To changes at my request and updated quote emailed asap. Kept up todate by Meredith of plumbers eta and whats the planned process. Was unbelievable customer relations by all. Thank you. And the finished workmanship. Impressive fits the job done. I must add the time frame from first call to enjoying hot shower was quicker than some others could get a quote done at my cost aswell. Hence i went searching and relied on local and others reviews. Ten outa ten 👍


Rodney Nunn
1715312077
Jackson and tayte fix my sewer and storm water pipe great blokes slaved away in the 30 degress heat got the job done and im totally happy with the out come
©DCM Plumbing & Drainage 2024 All Rights Reserved
Terms and PrivacyGold Coast SEO & Design by Five by Five